

One of the hallmarks of a great mix is separation between every instrument. Most mix elements have wide frequency spectrums—even a kick drum can extend well into the high mids and above. When so much information exists in every instrument, it’s easy for things to sound cluttered and messy. Creating space in your mixes is a must for a clear, defined sound!

Start with the Arrangement
If you’re working on a personal project or with a client in a more hands-on, producer type role, you’re free to play around with arrangement. This is actually the first place to start to make space in your mixes.
Making space with arrangement means switching up parts so nothing is stepping on something else. For example, you could have a doubled-up guitar part which sounds like mush in the mix. One thing you could try is playing one of the guitars up an octave so each part is in a different frequency range.
When changing arrangement isn’t an option, you’ll have to rely on other mixing fundamentals.
Level
After arrangement, volume is the next place to go. A lot of times this will be the first place because we’re mixing pre-recorded tracks for a client.
The level-to-level relationship between tracks will determine the overall foundation of your mix, and you’ll know right away whether the space you’re creating is working.
At this stage you’ll have the ability to bring instruments forward or push them back, all with the goal of creating separation/space in mind.
Of course, a mix with separation doesn’t stop with static volume levels. You’ll probably want to do some automation at certain points further in the mixing process.
Panning
Panning allows us to place elements in the stereo field. A bulk of panning tends to dictate itself from common sense, like with drum overheads or multi-tracked rhythm guitars going far left and right. Other times you can get a bit clever with it, again using automation or even auto-panner plugins.
Keep in mind that panning is mostly used to create width as well as separation.
If you have multiple vocal harmonies, for example, they may sound rather flat stacked on top of one another. But if you move a track over to the left and another to the right, with a lead vocal sitting in the center, you will have widened your vocals and made them sound bigger. This concept can be applied to anything as long as it sounds good to you.
- Related: 5 Quick Panning Tricks
- Related: Best UAD Plugins in 2022
- Related: Best UAD Plugins for Vocals
Compression
Compressors and other dynamics tools are used to control the volume envelope of a sound. Tools like compressors, limiters, noise gates, and de-essers are all examples of dynamics processors, which can control or smooth out the peaks and troughs of a given signal.
We usually think of compression as glueing things together, but it can actually be used to create separation too. Tricks like sidechain can be used to duck instruments out of each other’s way, effectively making space in your mixes.
EQ

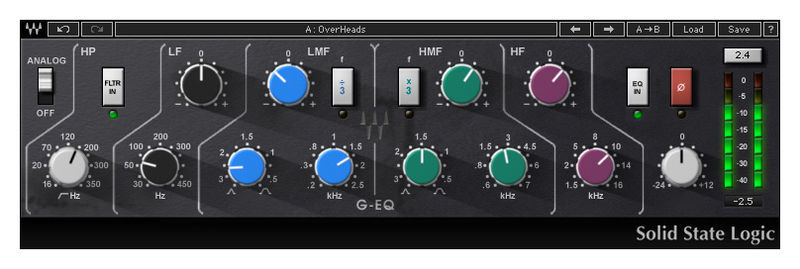
EQ is your best friend. Remember when we mentioned instruments having overlapping frequencies? With EQ, you’ll able to carve out a unique space for each mix element to live.
If you tracks are recorded well, a little bit of EQ can go a long way. Sometimes even a filter is all you really need to clean something up and get it out of the way of another instrument.
With a kick drum, for instance, you can start with a high-pass filter to clean up the bottom end and get it out of the bass’s way, as well as a low-pass filter to carve away any unwanted top end competing with other mid-range instruments like guitars. The same logic can be applied to everything in your mix!
Clashing frequencies are the focus here, and by removing those you’ll begin to make space in your mixes. To improve your workflow, it’s great to have a reference like this EQ cheat sheet, readily available.
Reverb and Delay
We use tools like reverb and delay to create that front-to-back dimension and separation in mixes. With reverb you can bring elements forward (short decays) or push them farther away (long decays).
Using either or both reverb and delay can create an aural space for an instrument to sit, can add “excitement” to a track, and can add depth and dimension to an instrument.

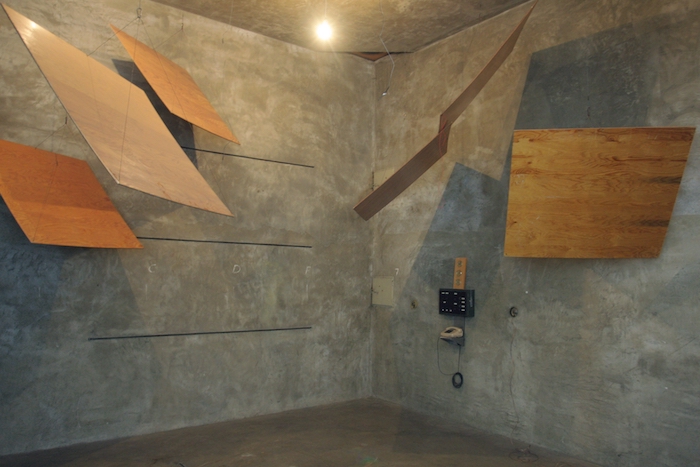
To create an aural space, for instance, a great trick is to imagine the performer in an acoustic environment and to attempt to recreate what that environment might sound like by using reverb. Additionally, to make something sound bigger or more exciting, experiment with using small reverbs or short delays.
Pre-delay on reverb is a key as well. It essentially separates the wet and dry signals by a determined amount, so the dry signal will still be more prominent than the wet one—perfect for creating space and separation!
For more reverb tips, check out our 5 quick reverb tricks to improve your mix.