

Vocals are one of the most important elements in a song, regardless of genre. It’s safe to say that how you approach mixing vocals can make or break your track. Have you ever heard a hit record, or even just a really good song, with a poorly mixed singer? Probably not…and it’s especially uncommon with the pristine pop vocals we’re accustomed to in modern music.
Mixing vocals can be tricky, even when you’re working with a well recorded, talented artist. The following tips are a great place to start in order to achieve better, more professional sounding vocals. How creative you decide to get with your vocal mixes is entirely up to you!

First and Foremost: Mix in Context
This concept applies to every element in your mix–not just vocals. Soloing a track and making it sound fantastic by itself is great, but what about the bigger picture? When we rely on the solo button for too long, we lose our frame of reference and can find that the processing we’ve done doesn’t sit right in the full mix.
We can save time and avoid headaches by frequently un-soloing to make sure the changes we’ve made are working. No one wants to reach the end of a long signal processing chain to find their vocals sound amazing–but only by themselves.
For instance, I find myself only using solo when I’m doing surgical EQ or automating certain parameters. The bulk of my vocal mixing is done with the whole track playing, presuming that vocals are the final element to be incorporated.
Experiment with the De-Esser
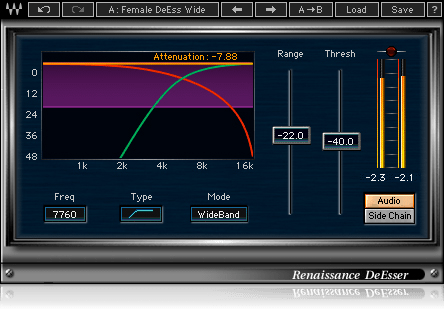

Sibilance–that hissing noise produced with “s” sounds–is a naturally occurring phenomenon within the human voice. While we don’t consider it unpleasant in conversation–if we notice it at all–on a recorded vocal, sibilance can often be overwhelmingly harsh.
Using a de-esser to control sibilant frequencies, generally somewhere between 4 and 7 kHz, is crucial. A great de-essing plugin will retain presence/clarity without totally flattening out an exciting performance. I’ve seen them used to tame some of the harsher frequencies around 1.5 kHz, too. Every voice is different, so mileage may vary from artist to artist!
An awesome trick for mixing vocals is to boost the top end with an EQ and control it with a de-esser. You’ll get the brightness and clarity from boosting with the EQ, minus the exaggerated “s” and “t” sounds thanks to the de-esser.
Tips for Reverbs and Delays
When we use a time-based effect like reverb, we’re trying to create a “space” for a mix element to live. Oftentimes we add it with the intention of bringing our vocals to the front, when in reality we find we’ve only pushed them further away.
The quick fix? Pre-delay. Many reverb plugins have this parameter, and it functions by separating the dry signal from the wet signal via a user-set delay. The result is hearing the space and dimension that we wanted from our reverb without pushing the dry vocal into the recesses of the mix.


You can also get very creative with delay in a variety of ways. One of the more common techniques is to automate the delay on certain words or phrases. If a particular line bears repeating, have the delay bypassed until you reach the desired lyric and automate it on.
Another thing to remember is to EQ your reverb and delay returns. Most of the time, we don’t want our reverbs and delays sharing the exact same frequency space as our dry vocals. If you bandpass your effects return–say between 600 Hz and 4 kHz–your wet/dry signals won’t be competing for room.
Important Frequencies When Mixing Vocals


Akin to the compression starting points outlined above, knowing specific frequencies and how they effect vocals means you can make quick, precise adjustments with less guesswork. Check out these five areas of interest for vocal EQ:
- 120 Hz: Fullness
- 240 Hz: Boominess
- 5 kHz: Presence
- 4 to 7 kHz: Sibilance
- 10 to 15 kHz: Air
Experiment with each of these frequencies or bands and see how they effect your particular vocal mix. If a performance feels muddy, try cutting a bit around 240-250 Hz. If sibilance is particularly harsh, sweep between 4 and 7 kHz to find the most offensive frequencies and tame them. As always, listen and use what best suits your personal taste.
Vocal Compression
For those who are new to mixing, compression can be a rather mysterious signal processor. On paper, it’s easy enough to understand that a compressor smooths out a performance by bringing peaks down and valleys up. However, it’s sometimes difficult to determine its effects for ears that are unaccustomed to it.
If you find yourself struggling with vocal compression, the following is an excellent starting point to orientate yourself:
Set a ratio of 4:1; set the attack time to medium or fast; adjust for a medium releasetime; and adjust the threshold for about 4-6 dB of gain reduction.


These rules aren’t hard and fast, so use your judgement and compress to taste! What works for one track may not work for another, and so on, but these guidelines are a wonderful place to start.
Parallel Compression
Another common technique used for more aggressive or exciting vocals is parallel compression. It works by duplicating the desired vocal track and slamming it with a compressor to the point where it’s unpleasant on its own. Then, you gradually mix in the duplicated, slammed channel with the main vocal channel to taste.
Saturation
We’re all familiar with basic compression and EQ, but how often do you consider saturation when mixing a vocal track?
When we use the term “saturation,” we’re referring to plugins that emulate what analogue equipment used to do to a recording. Saturation adds rich harmonics/overtones and a bit of distortion to make a vocal “fatter” and more exciting for listeners. It can help push a performance to the front for an “in-your-face” sound.
Experiment with saturation to give a vocal more edge, helping it stand out in a dense mix. Lo-Fi, included with Pro Tools, is just one example of these types of plugins that can enhance an otherwise dry/dull vocal. Mixing vocals is fun, so have some while you’re at it!
