
In today’s video we will be going over Drum EQ Basics! We also have the multitracks for you to download, so you can follow along and mix them yourself!
Click here to download the multitracks!
EQ is one of the most powerful things you can do to make a drum kit jump out of the mix. Today, we will using a very simple drum recording: there are two kick drum mics, two snare mics, a hi-hat, rack, floor tom mic, overheads, and a stereo room. I will be showing you how to get really quick, simple results from nearly any type of drum recording.
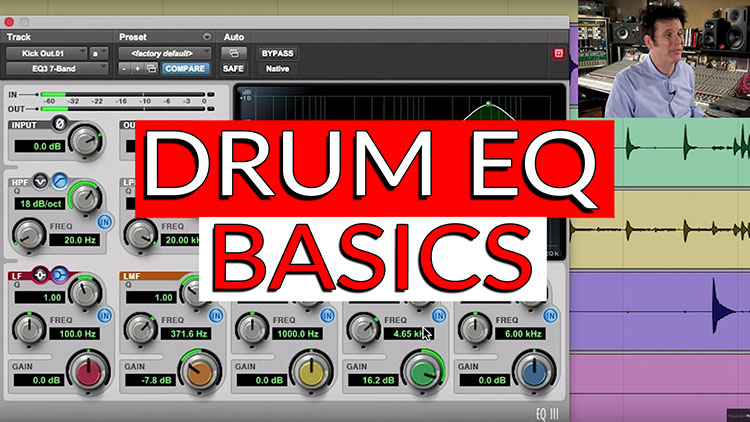
First, we will be working on the inside of the kick drum. This one is a little bit clicky as it is picking up some of that snappiness of the beater hitting the head. Let’s apply a stock EQ plugin to get us started. Most of you know the principle of finding ugly areas and getting rid of them. To do that I am going to make the Q narrow and give it a boost, and once I find that ugly area, I will widen the Q. With that wide Q, I am going to do the opposite and cut that, which gets rid of some of that unwanted excessive bleed that you hear, as well as getting rid of that ugly mid range. Now, I am going to cut and widen it a bit more, and this cut exaggerates the clickiness more and that low thump below. Even on a kick drum, high-passing is not a bad thing, so I am going to make the slope a little bit more aggressive here.
Once we have finished with the inside kick drum, we can move on to the outside. This has a lovely low-end and no click. The first thing I am going to do here is a bit of high passing. We don’t need to boost any 60 here, because it already has this great low end. There is also not much clickiness to grab, but we can boost 3k and above. With just a few more simple adjustments, you can then put the two elements together and you will be left with a really focused kick drum!
The next step is the snare! To begin, let’s go to about 7k on the snare top, which will definitely bring out the super highs of the snare, then add a little high passing. It is far too aggressive here, so I am going to boost at the same frequency I cut. The snare bottom is kind of mid-range, and it might be nice to get some body out of that. We can’t get much low-end out of this, but I am going to come up to 220 Hz exactly. I can here more kick in there now, so I am going to high-pass. Next, I will bring this down to about 5k like with the snare top, and boost gently. The snare is now brighter, a little more up-front, and there’s much more body in it. We have also gotten rid of some of that mid-range, which is nice on the snare bottom.
For the hi-hat, the fundamental is all in the mid-range, so if we grab an EQ we can high-pass it quite dramatically. I took it up to about 400 Hz, and high-passed it up to there, and it is sounding great! Cutting low-mids like we’ve done with the kick drum and the hi-hat, plus boosting the top and bottom on the snare drum mics means that low-mid is significantly less in the drums, which is going to give much more clarity.
Following these adjustments, I made some simple adjustments to the Toms, the overheads, and the room mics. The end result is much more focus on the drum kit with the careful use of high passing. One of the biggest things you are going to hear is when you high-pass a lot of those elements that don’t have the low-end in the actual mic itself, you get rid of the humming sound of all the bottom heads. This has allowed for a much clearer and cleaner sound.
With EQ, we often do compression, reverbs, delays, and more, but many of you have asked me to keep it simple! Watch the video below to learn more about drum EQ basics and see the changes I made to get this cleaner sound!
