


For this week’s FAQ Friday, we had the incredible privilege of sitting down with the multi-Grammy-winning engineer, Darrell Thorp! With years of experience working with some of the biggest names in music, Darrell shared his insights and expertise by answering four key questions submitted by our community. He tackled topics like controlling drum ringing, addressing artist performance challenges, knowing when a mix is finished, and navigating client recalls and feedback. Darrell’s advice is packed with practical tips and real-world wisdom—let’s dive in!

One of the most common issues faced during drum recording is the ringing of toms and cymbals when they are struck. This can often be attributed to the tuning of the drums, but there are several ways to address this issue.

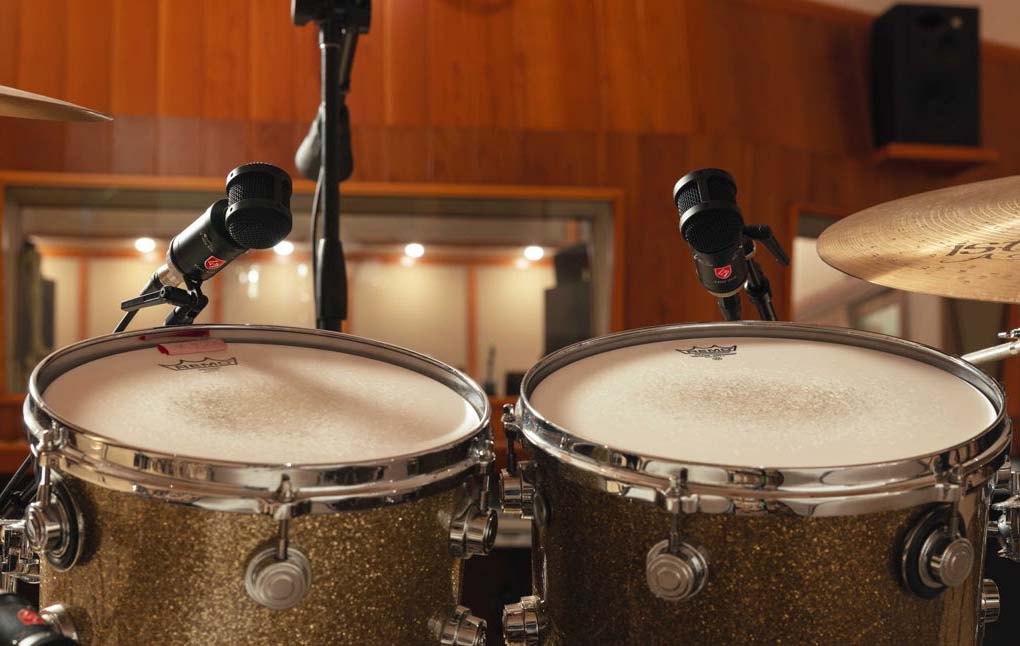
- Tuning and Dampening
First and foremost, tuning and dampening the drums correctly is crucial. If the drums are not tuned and dampened properly, they will naturally ring out more. However, even well-tuned drums can produce unwanted resonance. To mitigate this, consider using dampening techniques. Placing pieces of tape around the edges of the drum can help reduce the ring without completely muting the sound. - Microphone Selection
The choice of microphone can significantly impact how much ambient noise is captured. High-quality microphones designed specifically for drum recording, such as those from Lauten Audio, The LS308, The Snare Mic and The Tom Mic which are designed for high rejection rates, meaning they will pick up more of the direct sound and less of the surrounding noise. Using dynamic microphones like the Sennheiser 421 can also help focus on the desired sound while minimizing bleed from other instruments. - Microphone Placement
Proper microphone placement is equally important. Experimenting with different positions can help find the sweet spot where the sound is best captured. While condenser mics are excellent for their sensitivity, they can also pick up excessive ambient noise. Therefore, strategically placing dynamic mics can help control what is recorded. Placing the mics so the cymbals are in null point of the microphone will really help bleed issues. - Using Drum Gates
In post-production, tools like the Oxford Drum Gate or Sound Radix Drum Leveler can be incredibly useful. These plugins can help control the bleed from other instruments, allowing you to focus on the primary sound of the drums. The Drum Leveler, in particular, is versatile, as it can adjust the levels of ambient sounds based on the peaks of the main drum hit.


2. Addressing Artist Performance Issues
Recording sessions can sometimes hit a snag when artists feel blocked or uncomfortable. Understanding the psychology behind these moments is key to getting the best performance.
- Create a Comfortable Environment
First, assess the environment. Is the lighting right? Does the artist feel at ease? Sometimes, simply adjusting the room’s atmosphere can make a significant difference. Ensuring that the artist feels comfortable can lead to better performances. - Equipment Familiarity
Another common issue arises when artists are using unfamiliar equipment. For instance, if a singer is used to a specific microphone, switching to a more expensive model may create a disconnect. It’s important to communicate with the artist about their preferences and to use equipment they are comfortable with. In one instance, switching back to a familiar microphone led to a noticeable improvement in the artist’s performance. - Tone and Gear Adjustments
Sometimes, the issue may stem from the sound quality. If an artist is struggling with their guitar tone, it may be necessary to switch amplifiers or make adjustments to the settings. Finding the right sound can help the artist feel more inspired and lead to better takes.
3. Knowing When a Mix is Finished
Determining when a mix is finished can be challenging. A common rule of thumb is when you’re constantly adjusting levels without a clear direction. If you find yourself turning up and down various elements without achieving a satisfying result, it may be time to step back.
- Take Breaks
When in doubt, take a break. Stepping away from the mix can provide fresh ears when you return. Often, you’ll be able to identify issues that weren’t apparent before. - Seek Feedback
Getting feedback from others can also help clarify whether the mix is ready. Sharing it with a trusted colleague or friend can provide a new perspective and help you identify any lingering issues.


4. Handling Client Recalls and Feedback
Working with clients can sometimes present challenges, especially when they struggle to articulate their needs. Here are some strategies for navigating these situations effectively.
- Clarify Feedback
When clients provide vague feedback, it’s essential to ask specific questions to clarify their comments. For example, if they say the kick drum is too loud, ask if it’s the volume or the overall sound they dislike, is there too much low end, does ‘too loud’ really mean too big? This can help narrow down the changes needed. - Document Changes
Keeping detailed notes of changes made during recalls can be beneficial. By documenting each adjustment, you can track what has been altered and provide a clearer explanation to the client. This approach helps create a more organized workflow and ensures that nothing gets overlooked. - Set Limits on Recalls
Establishing a limit for recalls can help manage expectations. Setting a fair number, such as ten recalls, allows for necessary adjustments while preventing endless tweaking that can lead to frustration for both parties.
Final Thoughts
Recording drums and working with artists can be a complex process, but with the right techniques and a good understanding of the creative dynamics at play, you can achieve outstanding results. Remember to focus on tuning, microphone choice, and placement to control ringing, while also fostering a comfortable environment for artists to perform their best. By mastering these skills, you’ll be well on your way to producing high-quality recordings that resonate with listeners.