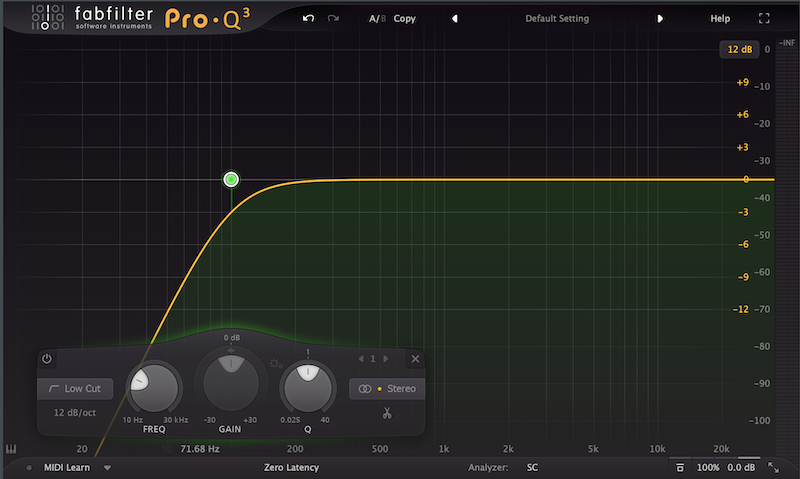
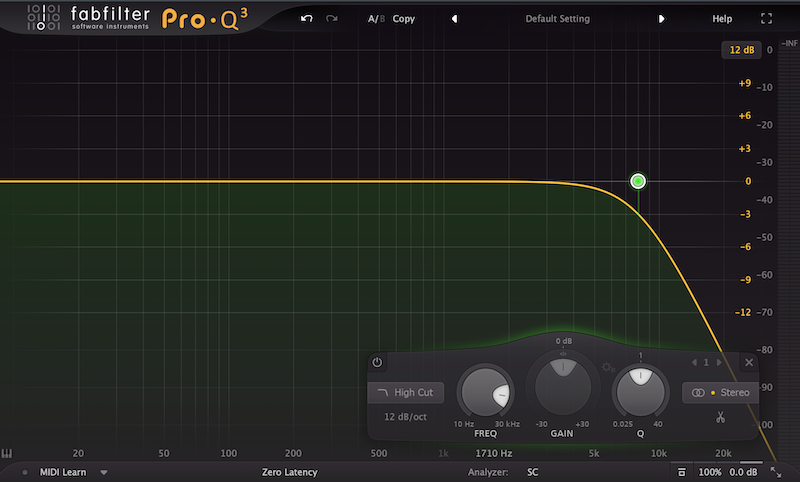
The most frequently used audio pass filters you’ll come across are high- and low-pass filters. High-pass filters (also called “low-cut”) attenuate low-end below the chosen frequency. Literally at the other end of the spectrum are low-pass filters (also called “high-cut”), which attenuate high-end above the chosen frequency.
Audio pass filters are not only easy to use, but they’re incredibly useful for carving out space for every mix element to live. A HPF, especially, is one of the first things to reach for when you start to EQ an instrument!
How to Use Audio Pass Filters
1. Enhance the low-end by using HPFs

Unfortunately, there’s a lot of misinformation out there about high-passing. Some people even go so far as to say not to high-pass at all!
Plain and simple, this kind of misguided information will ruin the low-end of your mix. Create space for every instrument, use gentle high-pass slopes, boost low-end info that adds to the sound of the instrument, and high-pass information that competes with other instruments. Great mixers will even high-pass a kick drum! Taking out some 20 Hz or even as high as 30-50 Hz will focus your kick and get your mix louder.
It seems counterintuitive to enhance low-end by removing it. But the truth about sub frequencies is that not only are they too low to even hear, but they eat up a ton of space in a mix. You need to get rid of some of that super low-end muck to make room for everything else—you can then boost higher harmonies that add to the sound of the instrument.
High-pass filters aren’t just for bass instruments, though. You can focus vocals and other midrange instruments by cutting away everything below 100 Hz and sometimes higher! On midrange instruments like the human voice and guitars, for example, excessive low-end information muddies the overall tonality. It takes away from the midrange where these instruments actually shine.
For more, check out Cleaning up a Muddy Mix
2. Remove unwanted harmonics with HPFs
High-pass filters are frequently used well into the low-mids on instruments without a ton of low-end content. Hi-hats, for instance, are commonly high-passed up to 300 Hz. In electronic samples you might go all the way up to 1 or 2 kHz where the interesting fundamentals live!
Generally speaking, if you have an EQ with a spectrum analyzer, you’ll notice that there’s information across the entire frequency range—even on high-end instruments like hi-hat and cymbals. You can remove unwanted harmonics in the low-end with a high-pass filter to focus on the useful parts of the spectrum.
Let the bass instruments fill in the low end, and remove mud from midrange-focused instruments.
3. Create depth with LPFs

Front to back depth is a really important part of any great mix. One of the ways we can achieve depth is by using audio pass filters—specifically, an LPF.
Creating depth means bringing elements forward and pushing others back. A low-pass filter is a quick way of pushing something further back by removing a lot of top-end.
Think about it this way: in real life, when we hear something that’s physically far away, we hear more low frequencies with less detail. This is because lower frequencies have longer wavelengths that can travel greater distances than higher frequencies. The result is a somewhat muffled sound that’s far away.
Low-pass filtering an instrument will help push it back into the mix and make space for other elements you’d prefer to be more forward.
4. Reduce clashing with LPFs
In a similar way that LPFs can push instruments back and create depth, they can also reduce clashing between multiple stacks of the same instrument.
A really common use of LPFs to reduce clashing is on layered vocals with maybe a lead, a double, and multiple backgrounds. All of these together take up a ton of space, but you can use LPFs on the doubles and background to let the lead stand out.
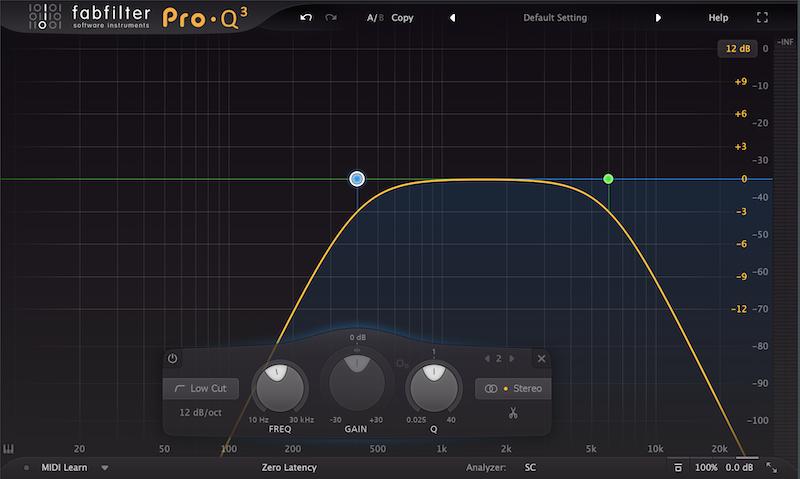
5. The Abbey Road Trick: high- and low-pass your reverb returns
One of the quickest and easiest ways to clean up your mix with audio pass filters is to insert an EQ after your reverb plugin. This tip gets beaten to death, but it’s really that useful!
Full-frequency reverbs eat up a lot of space in the mix, because you’re essentially doubling up on an instrument. Rolling off both the high and low ends means you’ve removed unnecessary frequencies that will clash with the rest of the mix.
It’s called the Abbey Road trick because that’s where the technique was born. You can filter up to 600 Hz and down to 6 or 7 kHz depending on the instrument. This also works on delays!
Audio pass filters are some of the most useful tools we have! When you start using them, you’ll notice a difference right away. Don’t be afraid to experiment, but be aware of over-using them too! With a clear purpose in mind, audio pass filters can make a world of difference in your mixes!
