
If you plan to put the final polish on your mixes at home, you’ll need to understand mastering in the box. Some techniques involve things like additional EQ, compression, M/S processing, and limiting to finalize a song before release.
Generally when it comes to mastering, you’ll want a great bus compressor, a limiter, an EQ, and most of the processors you’re already familiar with for mixing. Many plugins for mastering in the box combine most of the features you’ll need into a single piece of software.

How to Master in the Box
Mastering digital audio is kind of like one final check and coat of varnish on a mix before a song is called finished. A few of the main things mastering engineers do is make a track louder, both in volume as well as perceived volume, make a song sound better (which is, of course, subjective), and ultimately ensure a song translates to various playback systems.
From a traditional standpoint, a mastering engineer should be a different person than the mixing engineer. Mastering is a specialized skillset, and these types of engineers have spent year training their ears and honing their chops specifically for the final stop a song makes on its way to release. Sending a mix to a dedicated mastering engineer is also like getting a second opinion and fresh set of ears on a song—one last quality check.
Today, however, it’s more and more common for mixers to do their own mastering in the box as well. Here are some basic steps in the mastering process so you can practice mastering yourself. One disclaimer: acoustic treatment is absolutely necessary for accurate mastering. If you try to master in an untreated room, it just won’t work. Mastering studios are highly treated and designed specifically for this process. At the very least, you should have some basic acoustic treatment, or at least a pair of headphones you trust—it’s even better if those headphones are different than the ones you mixed on!
Step 1: Prep the mix for mastering
Remove any heavy mix bus processing, especially limiting. Mastering requires a bit of headroom for all of the extra processing you’re about to add. Make sure the mix isn’t clipping at any point in the song, because that can cause irreparable damage that mastering can’t fix. Old wisdom said mastering requires 3 to 6 dB of headroom, but that isn’t necessarily true. Just make sure there’s no clipping.
Now you’ll want to bounce out the stereo mix. If there’s any doubt about headroom, bounce it out in 32-bit so you can clip gain the stereo track down before mastering.
Step 2: Create a new mastering session
Fire up a new session and import the mix as well as any references. That second part is pretty crucial; referencing released songs in the same genre/aesthetic will help guide your decisions. You don’t want to make aimless moves this far along in the process.
Step 3: Listen carefully
Now you want to listen as critically as your ability allows. Play your mix, and take notes on things you may want to fix or address. Play your references and A/B them with your mix. Think about what type of mastering moves you can make to get the sound as close to your references as possible. Listen carefully, be patient, take frequent breaks, and jot down notes.
Step 4: Tame the dynamics
When you’re satisfied with your critical listening and notes, you can begin by taming the dynamics of the mix. Gentle compression with your favorite plugin, somewhere in the realm of 1-2 dB of gain reduction can be plenty. At this point, there aren’t any rules; just be confident that any effects you’re adding to the entire mix are enhancing the track (keep that in mind throughout the rest of the steps as well). Really, that’s the primary goal of mastering in the box.
Step 5: Address the overall tonality
This is the EQ phase. Generally speaking you’re trying to match the overall tonal balance of your reference(s). This could be boosting a bit of lows and boosting a bit of highs, or whatever it takes to get close to your reference. Multiband compression, in addition to EQ, can be helpful for balancing the overall frequency spectrum as well. Just be careful with multiband, because it can get out of hand pretty quickly.
Step 6: Add enhancing effects (if needed)
This step involves adding effects like saturation (for increased perceived loudness), spatial effects like stereo widening, and more. Anything that adds to the mix and enhances what’s already there can be part of this step. Maybe just adding a touch of tape saturation can take the vibe over the top and put some extra sheen on the mix.
Step 7: Add a limiter
Finally you’ll want to limit the mix for loudness at the end of the chain. You don’t want to squash the heck out of it, but shoot for somewhere in the realm of 2 to 4 dB of gain reduction at the loudest parts of the mix.
Step 8: Bounce out the master
Once you’re satisfied with your mastering job, and confident the mix has been enhanced by these additional steps, you can print/bounce your mastered song!
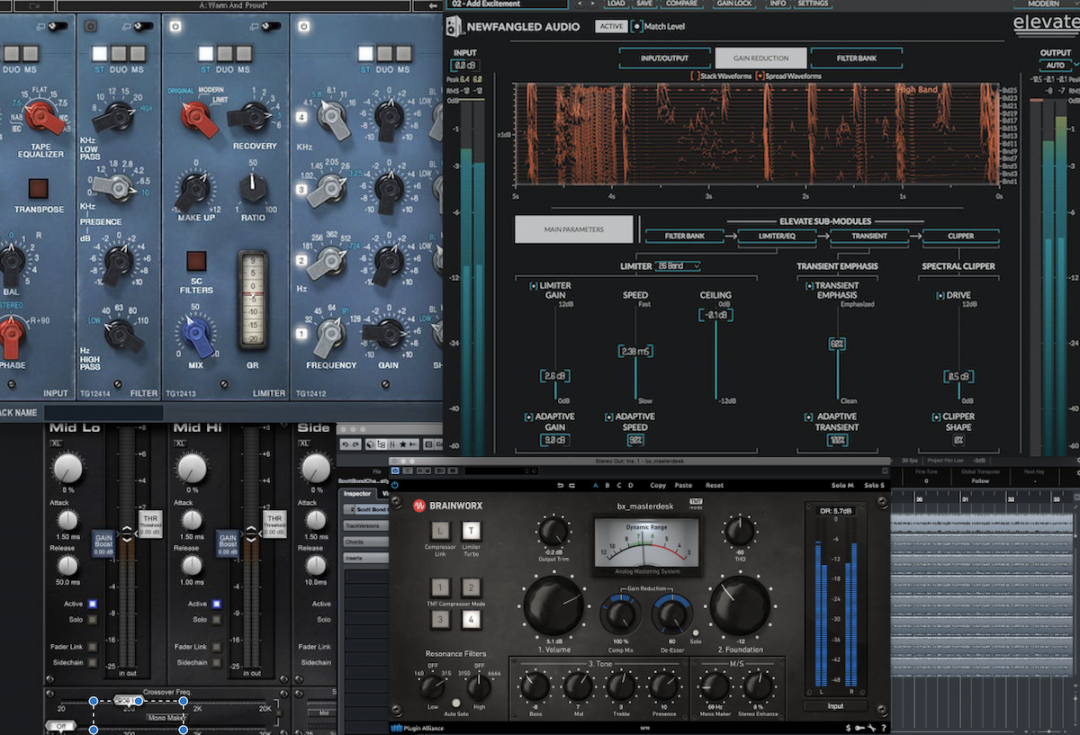
Here are some of our favorite plugins for mastering in the box:
- iZotope Ozone 9
- bx_XL V2
- bx_Masterdesk
- Soundtheory Gullfoss
- Nugen MasterCheck Pro
Ozone 9 – iZotope
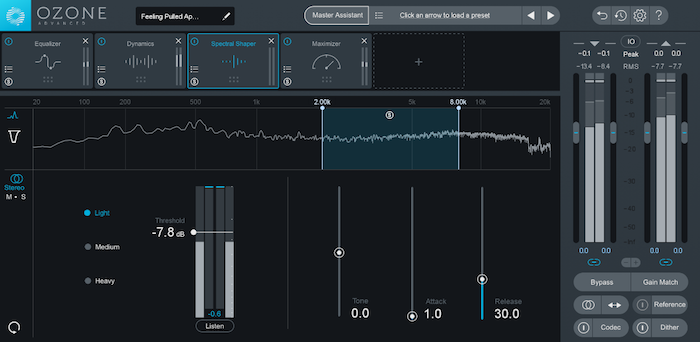

Ozone 9 is an intelligent mastering assistant that uses AI to dial in the perfect settings. Among its varied and valuable assets is the ability to achieve the ideal loudness for streaming, which is a critical part of mastering today. It can go much further than that, however, and actually EQ match a reference track and achieve the appropriate tonal balance for your song. As far as an all-in-one plugin for mastering in the box goes, Ozone 9 is very much at the top of the list.
bx_XL V2 – Brainworx
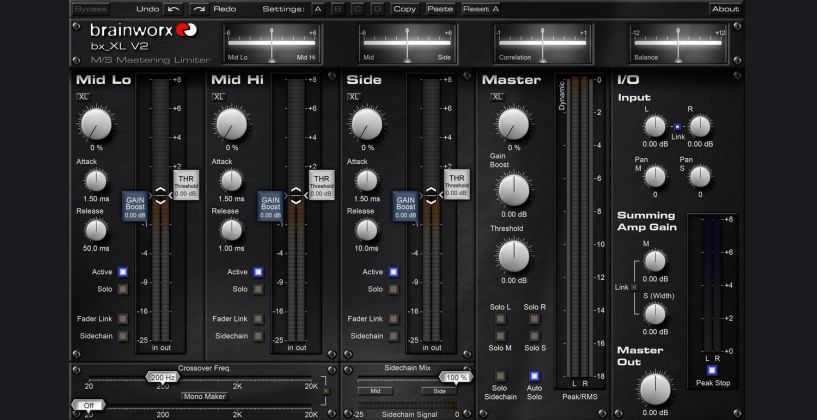

XL by Brainworx is a fantastic M/S limiter. Where ‘regular’ limiters just smash the whole signal, you have more precise control over four parts of the track: the Mid Lows, Mid Highs, Sides, and the overall Master. Apart from that you can choose a crossover frequency between the Mid bands, as well as make the signal mono at and below a set frequency (ideal for low end). Each band also has an XL knob which adds some saturation.
bx_Masterdesk – Brainworx
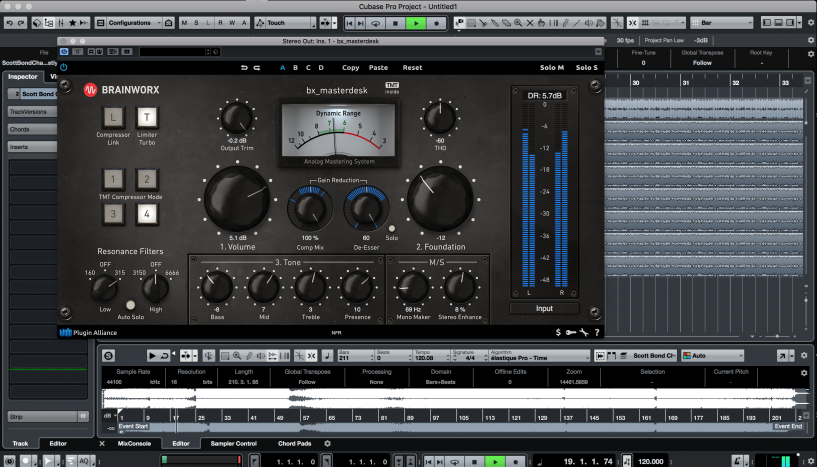

Masterdesk by Brainworx emulates a premium analog mastering chain. It’s practically the opposite of Ozone 9, which incorporates heavy AI to get the desired result. Instead, the user is the only one at the helm twisting knobs and doing the actual heavy lifting. Masterdesk includes all of the effects you’d want at hand for mastering in the box.
Gullfoss – Soundtheory
Ok, back to the AI stuff. Gullfoss by Soundtheory is an intelligent EQ plugin. It can ‘smartly’ detect weirdness in the frequency balance, and then change those frequencies so we perceive the absolute best version of the signal. So if there’s a huge and unnatural boost of a certain frequency or range, it can dial that back so that it’s not so overwhelming. Gullfoss is quickly becoming a secret weapon for many mastering, as well as mixing, engineers.
- SEE ALSO: Gullfoss EQ Review
MasterCheck – Nugen
Metering has always been important, but it’s even more crucial now with how music is delivered across various streaming platforms. They all have a different optimal level and it gets confusing fast. MasterCheck will reveal what happens to your master once it gets released on a streaming service.
- SEE ALSO: What Is a True Peak Limiter?
Unlock Your Audio Potential with Professional Guidance
Looking to enhance your sound engineering or music production skills? The Produce Like A Pro Academy is your perfect partner, offering a vast array of detailed tutorials and comprehensive courses. With resources crafted by industry experts, you’ll learn the secrets to producing top-quality audio.
Connect with a community of dedicated producers and take your audio projects from good to great by joining the Academy today!
- SEE ALSO: The 11 Best Mastering Plugins