
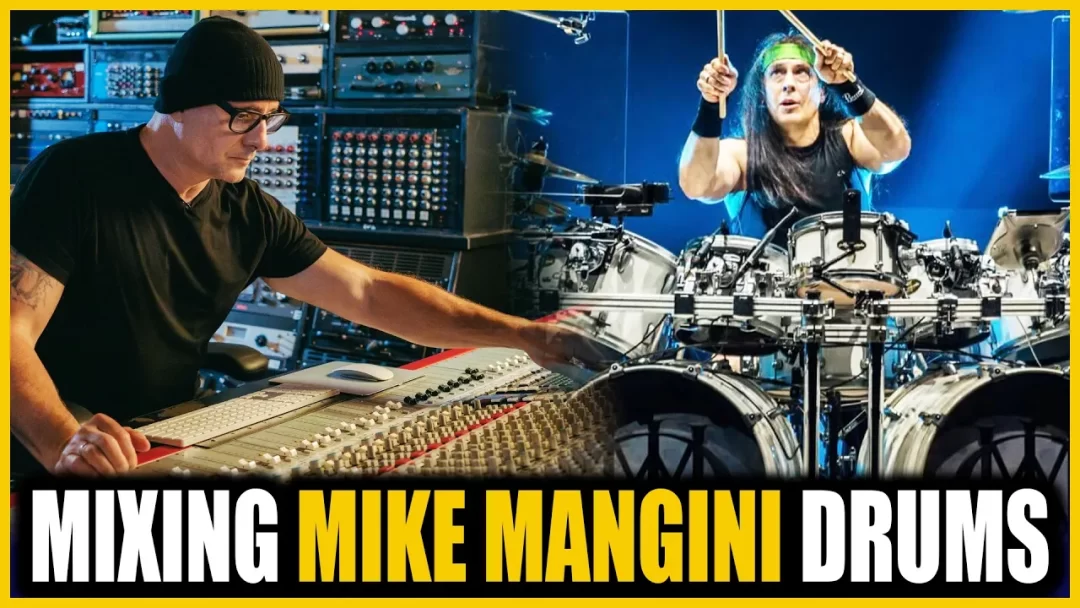

Mixing drums played by Mike Mangini presents an unusual challenge.
The performances are already incredibly controlled. The drums are tuned beautifully, the dynamics are intentional and every fill is designed around the arrangement.
In this video excerpt, Dan Malsch breaks down how he mixed Mike Mangini’s drums on Monolith’s “Mother Martyr,” including the kick, snare, toms, cymbals, gating, samples, EQ and parallel compression.
The excerpt comes from Dan’s complete Mixing Monolith’s “Mother Martyr” course, where he takes you through the entire mix, including the session setup, routing, EQ, compression, effects, automation and master bus processing. You also get the multitracks so you can follow along or create your own mix.
Watch the full course here: https://promixacademy.com/course/dan-malsch-mixing-monoliths-mother-martyr/
As Dan explains during his breakdown of Monolith’s song “Mother Martyr,” the real objective is not to completely reinvent the drum sound.
It is to enhance what is already there without destroying the musicality of Mike’s performance.
“Mike is such a great drummer. Really, what I have to do is try not to mess up what he sent me.”
Dan did not record the original session. The multitracks were sent to him, so his job began with understanding the existing drum sound, managing the live microphone bleed and building the additional size and aggression the dense production required.

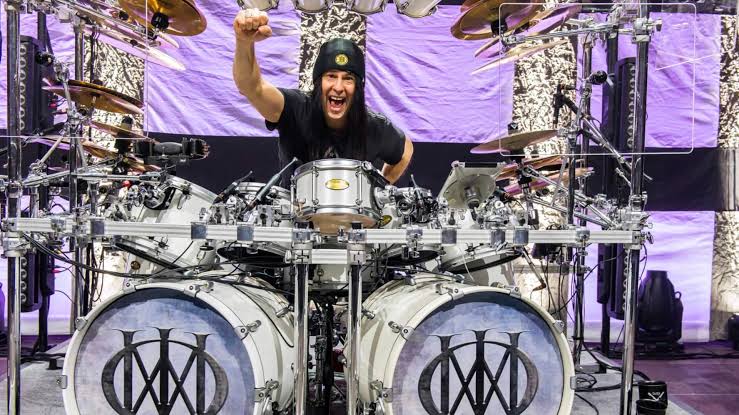
Keeping the Live Kick Drum at the Centre
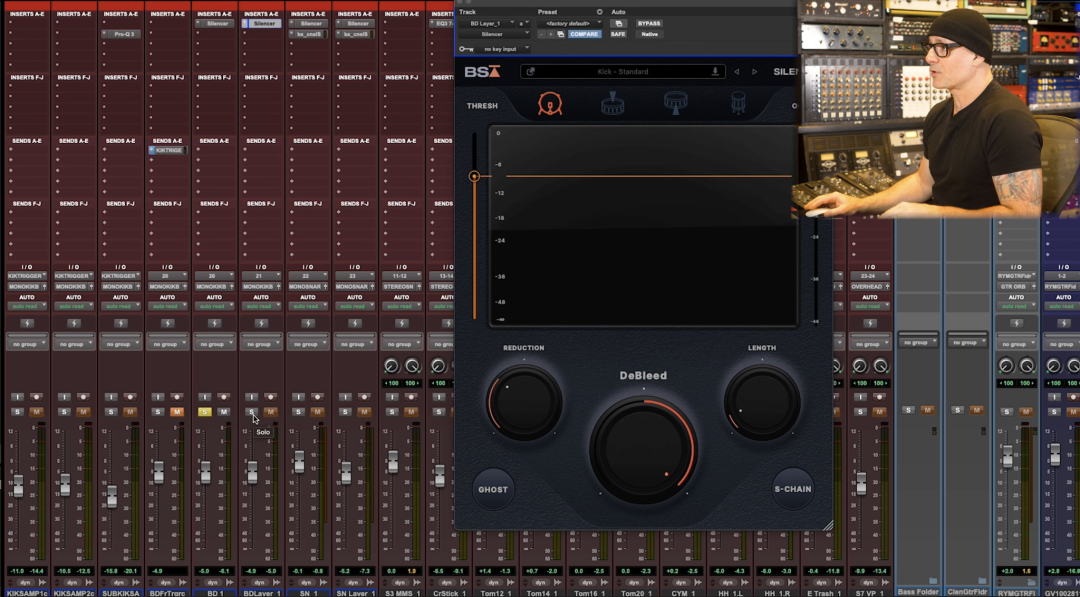
The original kick drum contained a substantial amount of bleed from the rest of the kit.
Rather than replacing it completely, Dan used Black Salt Audio’s Silencer to control the spill while retaining the character of the live recording.
The live kick remained louder than the additional samples throughout the mix.
This is an important distinction. The samples were not used to erase Mike’s original drum sound. They were used to provide specific qualities that the recorded kick needed inside the finished track.
Dan combined the original kick with a sample supplied by Mike, then added several of his own layers.
One was a dedicated sub-kick sample. Dan filtered out everything above approximately 70Hz, leaving only the deep low-frequency information.
By itself, the sub layer was not particularly obvious. Inside the complete drum mix, however, it added weight that could be felt more than heard.
Two additional samples supplied the attack and definition needed to help the kick remain audible against the guitars, bass and other instruments.
These samples sounded extremely clicky when soloed, but much of that attack disappeared once the complete arrangement was playing.
This is a useful reminder that drum processing should always be judged in context. A kick sample that sounds exaggerated by itself may be exactly what a dense mix requires.
Shaping the Kick Bus
All the kick layers were routed to a mono kick bus.
Dan used an SSL-style EQ, initially reducing the input level because the signal was hitting the plug-in too aggressively.
He filtered out some of the extreme sub information below approximately 30Hz, then cut around 440Hz using a wide Q to remove unwanted midrange.
He also boosted approximately 4dB around 77Hz to restore the useful low-end punch after removing the unnecessary sub-frequency buildup.
Dan prefers wide EQ curves when working with an SSL.
When he needs to make a highly surgical correction, he is more likely to reach for something such as FabFilter Pro-Q. The SSL is used for broader tonal shaping.
Additional filtering removed some energy at the very top and bottom of the signal before the kick was heavily limited.
The limiting was substantial, but it worked for the aggression and consistency required by this particular song.
Using Parallel Compression to Create Size
The kick bus was also sent to Dan’s drum crush bus.
This parallel bus used SSL Blitzer with an extremely fast, 1176-style compression setting.
The drum crush was blended unusually loudly in this mix.
Dan normally keeps parallel drum compression lower, but “Mother Martyr” benefited from the additional density, attack and ambience.
The session did not contain dedicated room microphones. Heavy parallel compression therefore became a way of generating the excitement and sustain that room microphones might normally provide.
When a drum kit is compressed aggressively, cymbal wash, microphone bleed and the natural decay of the kit become more noticeable. Dan used that effect intentionally to create the impression of a larger acoustic space.

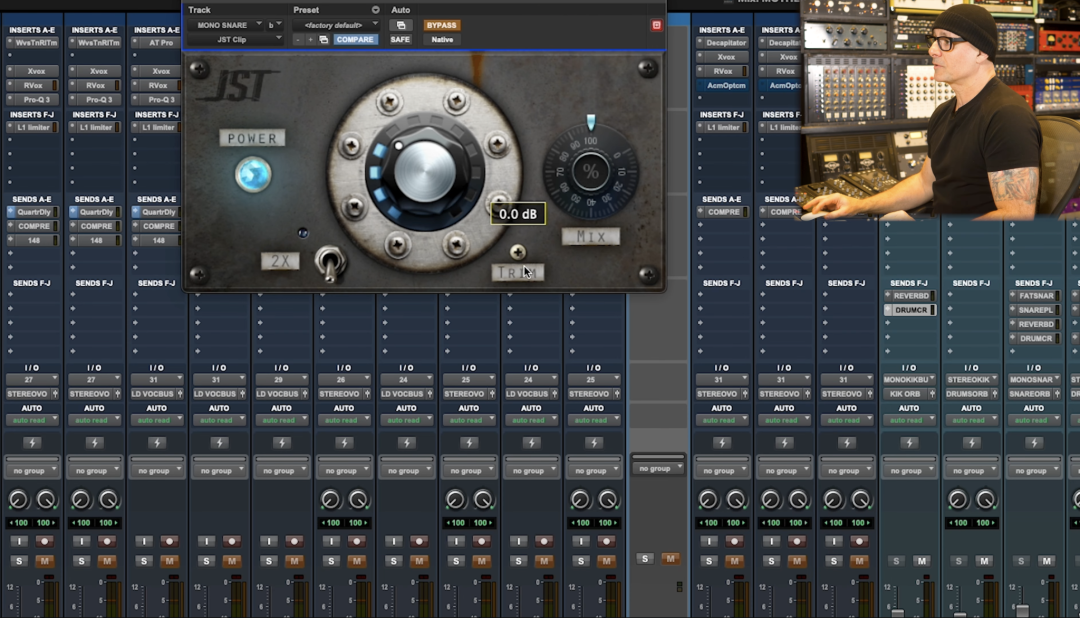
Thickening the Snare Drum
The primary snare track also contained significant live bleed.
Dan again used Silencer, but he was careful not to remove everything between the snare hits.
Mike Mangini is an extremely dynamic player, so an overly aggressive gate could easily remove ghost notes, soft articulations or the natural movement of the performance.
The goal was control rather than complete isolation.
The original snare sounded slightly thin to Dan, so he added approximately 4.2dB around 104Hz using an SSL 4K-style channel strip.
A second snare layer, supplied by Mike, provided additional thickness.
Dan did not add any of his own snare samples.
Interestingly, he also used the gate on the sample itself. The sample had a bright, ringing decay, so shortening it with the gate helped it sit more naturally alongside the live snare.
This demonstrates that gates are not only corrective tools. They can also be used as tone-shaping devices, controlling the length and brightness of a drum sound.
Matching Plug-ins Across Drum Layers
Dan often inserts the same plug-ins across related drum tracks, even when one of those plug-ins is not actively changing the signal.
For example, when an EQ is placed on the main snare track, he may place the same EQ on the snare sample or bottom microphone.
He does this to keep the signal paths consistent and avoid any possible latency or phase discrepancies.
Dan admits that modern delay compensation may already prevent these issues, but matching the plug-in chains gives him confidence that every layer remains aligned.
It is a small detail, but drum layers are extremely sensitive to timing and phase. Even tiny differences can alter the attack and body of the combined sound.
The AC/DC Snare Frequency
On the mono snare bus, Dan boosted several areas using broad curves.
He added presence around 5.5kHz and approximately 2.27kHz, then boosted roughly 3.5dB around 200Hz.
Dan describes 200Hz as one of his favourite frequencies on a snare drum because it provides what he calls the “AC/DC thickness.”
That lower-midrange weight was a recurring target throughout this mix.
The snare was also processed with clipping and limiting. Dan generally does not limit snares this heavily, but the approach worked in this arrangement.
During the final chorus, he even automated the snare bus above 0dB because the section needed additional impact.
Dan normally tries to keep his faders at or below unity, but he is willing to break his own rules when the song demands it.
Building the Snare Reverb
The snare was sent to two primary reverbs.
The first was a Lexicon 480L-style fat plate, one of Dan’s favourite reverb sounds.
The second came from Wild Spaces and produced a shorter, thicker ambience.
Soloed, the combined reverbs sounded extremely loud. Within the complete production, however, the dense guitars and instrumentation absorbed much of the reverb.
This is another example of why effects should not be judged in isolation.
What seems excessive by itself may sound perfectly balanced in the mix.
All the snare reverbs were routed to a dedicated return containing another SSL 4K channel strip. Dan added more 200Hz to the reverb itself, reinforcing the thickness he wanted from the complete snare sound.

Do Not Automatically Remove Every Bit of Bleed
The session included an additional high-tuned side snare that appeared during certain fills and rolls.
This microphone also contained considerable spill.
Dan controlled some of the brightness and bleed, but he intentionally left much of it intact.
Inside the track, the spill added energy and movement.
Cleaning every microphone too aggressively can make a drum recording feel smaller and less exciting. Bleed is not automatically a problem. It becomes a problem only when it negatively affects the mix.
A certain amount of controlled leakage can help the kit feel cohesive and alive.
Preserving Mike Mangini’s Tom Panning
Mike Mangini is very particular about the positioning of his toms.
The toms were supplied as stereo tracks with Mike’s preferred panning already established.
Although Dan would not normally work this way, he kept the stereo files and panned them hard left and right to preserve Mike’s intended placement.
The toms did not require any samples.
Mike’s tuning and playing provided all the power and consistency the production needed.
The main challenge was cymbal bleed. Because cymbals were positioned close to the tom microphones, cymbal crashes often appeared immediately after the tom hits.
Dan used Silencer, high-frequency filtering and manual fades to reduce those cymbal tails.
In some cases, he sacrificed a little of the tom’s high-frequency attack to gain better control over the cymbal spill.
This was a practical compromise. Removing a small amount of brightness from the tom allowed it to sit more clearly in the complete kit.

Processing the Tom Bus
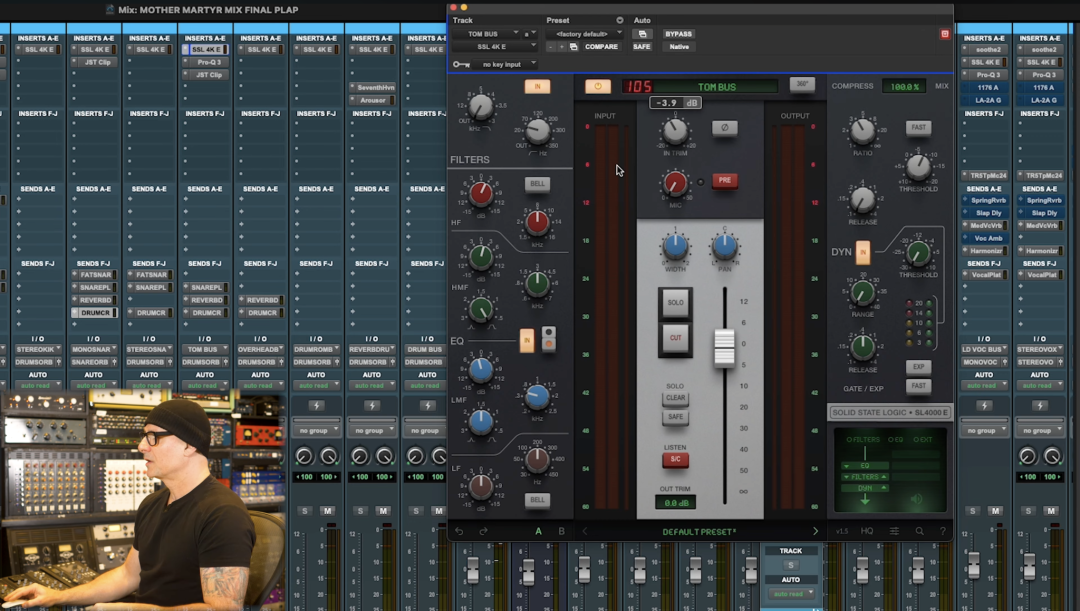
The toms were routed to a stereo tom bus containing an SSL 4K-style channel strip.
Dan reduced the input level, added some upper-midrange presence and cut around the 350Hz to 500Hz region.
This lower-midrange area can easily become boxy or cloudy on toms.
He also applied approximately 6dB of compression and removed some excess low-frequency buildup around 50Hz.
Although Dan had filtered high end from certain individual floor tom tracks to reduce cymbal bleed, he later restored some brightness on the combined tom bus.
This illustrates an effective way to approach drum EQ.
Individual microphones can be processed for control, while the combined bus can be shaped for overall tone.
The tom bus was also sent heavily to the drum crush, adding sustain and excitement without replacing the natural tom sound.
Letting the Overheads Stay Open
The overheads and individual hi-hat microphones were left largely open.
Dan did not aggressively gate or edit these tracks.
On the overhead bus, he added approximately 2dB around 12kHz, cut around 640Hz and boosted some 200Hz to continue reinforcing the weight of the snare and the kit.
The session included separate hi-hat microphones for the left and right sides of Mike’s setup.
During certain sections, Dan used clip gain to bring up the hi-hat performance rather than heavily processing it.
Other cymbal and percussion microphones were treated according to how they sounded rather than relying entirely on their track names.
One microphone sounded like an overhead, so Dan treated it as an overhead.
This kind of listening-first approach is particularly important when receiving sessions recorded by someone else. Track labels can provide guidance, but the sound of the microphone should ultimately determine how it is used.
Why Dan Does Not Use a Traditional Drum Bus
Dan’s routing differs from many mixers because he does not send the entire drum kit through one stereo drum bus.
Instead, he uses several individual buses for the kick, snare, toms, overheads and other drum elements.
Those buses are not then combined into another compressed stereo drum bus.
Most of the processing occurs at the individual track level, on the instrument buses or through parallel compression.
This approach allows Dan to control each section of the kit independently.
The kick can be limited heavily without forcing the cymbals through the same processing. The snare can receive additional thickness without affecting the toms. The overheads can remain open and dynamic while the close microphones supply aggression.
The drum crush then provides a shared source of excitement and ambience without locking the entire kit into a single processing chain.
Serving the Performance
The most important lesson from Dan Malsch’s mix is that the technical decisions remain secondary to Mike Mangini’s performance.
There are samples, gates, EQ, limiting, clipping, automation and heavy parallel compression throughout the session.
However, none of those techniques are intended to replace the drummer.
The original kick remains central. The snare retains its live character. The toms are completely natural and Mike’s preferred panning is preserved.
Dan’s processing adds weight, consistency and excitement while protecting the musical details that make Mike’s playing distinctive.
That balance is the real skill.
Great drum mixing is not about using the most processing. It is about recognising what the performance already provides, identifying what the production still needs and adding only what helps the song.
Learn the Complete Mix
In the full course, Dan takes you through the complete mix of Monolith’s “Mother Martyr,” including his session template, routing, EQ decisions, compression, effects, automation and master bus processing.
You will also receive the multitracks, allowing you to mix the song yourself or follow Dan’s process step by step.
Get the full Dan Malsch course here: https://promixacademy.com/course/dan-malsch-mixing-monoliths-mother-martyr/