
What makes a great recording and mix is oftentimes personal preference and subjectivity on behalf of the artist, producer, and engineers. It’s usually a series of small decisions along the way that amount to something great at the end, combined with the creative and technical ability to execute. While everyone’s taste is different, one common mark of a quality mix is intimacy—feeling like the artist or band is performing in the room with you. Stereo image is an important way to develop that sound.
Stereo Imaging Basics
You know when your favorite song sounds wide and deep, enveloping and immersive, on a pair of headphones or speakers? When you can pinpoint sounds coming from the left and right channels, or somewhere in between? Or when a sound or instrument appears closer, or farther away? That’s stereo image.
In the simplest way, we use panning to set the stereo image. That’s when we take sounds out of the center of the mix and start moving them left and right. Most of us understand and do this already, like moving parts of drum kit from the player’s or audience’s perspective, panning rhythm guitars hard left and right, and more.
Of course, there’s more to it than that. Good stereo imaging, where distinct elements can be easily located in “space,” is difficult to develop. Part of it is done at the recording stage, a lot is done during mixdown, and some final touchups occur in mastering.
Stereo Image: Width vs. Depth
We’ve thrown the terms width and depth around, but what do they mean for audio? Width generally refers to the stereo field and how we pan instruments left and right throughout it. At 0, or center, everything is going to sound like it’s between both speakers, or right out in front of us. But as we begin pushing instruments and sounds away from 0 into the far left and right channels, we’re essentially making a wider stereo image.
Depth, on the other hand, plays a key role in stereo image, but does not have to do with panning. Instead, depth is more about volume, or amplitude. It determines how close or how far away a sound is based on its relative volume in the mix. Time-based effects like reverb and delay also impact depth; longer decay times can make something sound like it’s farther away, pushed into the proverbial depths of the mix.
How, then, can we play with the stereo image in each stage of the production process?
Recording: Stereo Miking Techniques

“Fix it in pre” should be the motto when it comes to stereo image. Plugins can do a lot of cool things, but so can microphones when used effectively. In fact, stereo miking techniques can give us both width and depth on a sound source at the same time, without any further processing.
Stereo recording plays into the science of hearing and how we localize sound. It takes advantage of what are called interaural timing differences and interaural intensity differences. Basically, we hear sound through whichever ear it reaches first and there’s a tiny delay between both ears picking it up. And we also perceive a sound as being louder to the ear its closest to. Stereo miking techniques rely on how our ears and brain receives and analyzes sound to form stereo image.
- SEE ALSO: Decoding Mid/Side Miking Techniques
Spaced Pair
A spaced pair is the easiest to set up and creates the widest (and often deepest) stereo image. You take two microphones, point them at the sound source, and space them anywhere from 16″ to 10 feet or so from each other. Each mic’s distance from the sound source should be equal to the distance between them.
In your DAW, you’d pan each microphone left and right. The result is a very wide stereo image from the space between the mics, and many times a very deep image based on the distance from the sound source and how much room sound is captured.
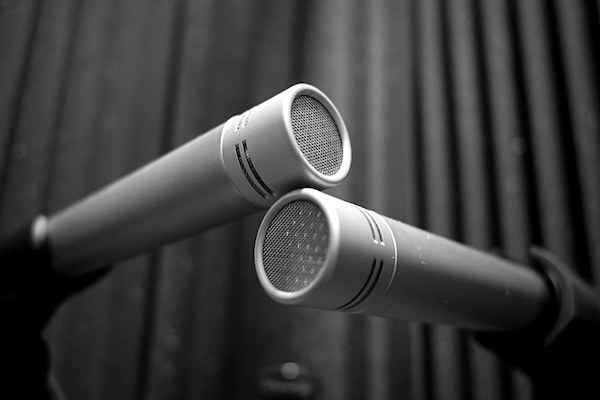
X/Y, Coincident
For an adequately wide, but shallower and more intimate stereo recording, the X/Y coincident pair is foolproof. The idea is to place two cardioid microphones with their capsules in the same plane; usually one on top of the other. You then angle them 90° to 135°.
Since the capsules are tightly together, you’re reducing the timing differences you’d get from a spaced pair. This makes the depth shallower, but the width is still comes through.
ORTF, Near-Coincident
ORTF stands for Office de Radiodiffusion Télévision Française. The engineers there came up with this microphone technique as a better, more natural sounding alternative to X/Y.
Instead of placing each capsule right on top of the other, the mics are actually placed end-to-end and pointed outward from the sound source at about an angle of 110°. What this does is balance out both width and depth in the stereo image, and the overall effect is quite similar to how our ears naturally localize sound.
Mid-Side
M/S uses both a cardioid for the center, and a bi-directional mic to capture the sides of a sound source. In your DAW, you’d leave the cardioid panned center, duplicate the bi-directional track, phase invert the copy, and pan each hard left and right. Done correctly, you now have control over the mid/side balance of the signal with three channels, and more control over the stereo image as a whole. Boosting the center makes the sound more intimate, while boosting the sides can create more width and depth.
Mixing: Panning Techniques

Panning is the most common way we affect the stereo image of a mix, and there a few different ways to approach it.
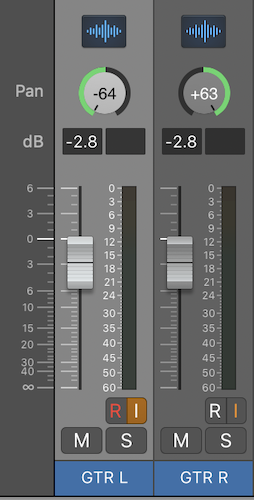
Traditional Panning
Traditional panning uses the pan pot on a channel in our DAW. It very simple allows you to send more or less signal to the left or right channels, taking them out of the center and placing them in the stereo field. We use it all the time on mono signals, and it’s generally one of the earliest ways a mix begins to take shape after leveling everything.
Delay-Based Panning
Delay-based panning makes use of the Haas effect—a psychoacoustic phenomenon dictating how we perceive directionality. One easy way to utilize delay-based panning is to throw a stereo delay on a mono signal, and start delaying just one side in really small increments—40ms or less. The signal will start to sound like it’s coming from the delayed side.
You can also duplicate a mono signal, pan those left and right, and delay one of the sides.
Spectral-Based Panning
Spectral-based panning uses EQ to alter the directionality of a sound source. Let’s say you recorded an acoustic guitar with an X/Y pair and have a nice stereo image of the instrument with each channel panned left and right. You want to slightly increase the perception of the guitar on the left side, so you put an EQ on the right channel and pull out of the highs. This is spectral-based panning; by removing important frequencies on the right side, the sound will be perceived more on the left.
Mastering: Stereo Image Considerations
When a song gets to mastering, the engineer is dealing with a stereo bounce of the entire track—not the individual elements. For the most part, mastering affects stereo image through different kinds of M/S processing (usually EQ). This provides some extra control over the stereo file, putting everything that’s mono in the center, and everything that is not mono in the side channels. From there you can adjust the mono and the stereo image of the whole mix.
A mastering engineer may also use M/S compression or limiting in their process, providing a different level of control of the mono and side, or stereo, aspects of a mix.
Conclusion: Stereo Imaging
Nailing the stereo image can be really tough. As you can see, there’s a lot more that goes into it than just using the panner in our DAW. It ultimately starts at the recording, where you can utilize stereo techniques, or even just mono mic placement and room ambience to add width or depth to a sound at the source. Once you’re in the DAW, there are multiple ways to alter the stereo image in fun, unique, and most of all, great sounding ways.