
Sidechain compression is an intermediate level mixing technique that allows you to set an alternate input signal source from the track on which the compressor is inserted. For instance, if you place a compressor on the bass guitar and “sidechain” or “key” its input to the kick drum, the compressor will only work on the bass each time the kick drum hits. It’s very useful for creating space in a mix by ducking other elements, or to add rhythm and excitement to a track.
How to Sidechain Your Compressor
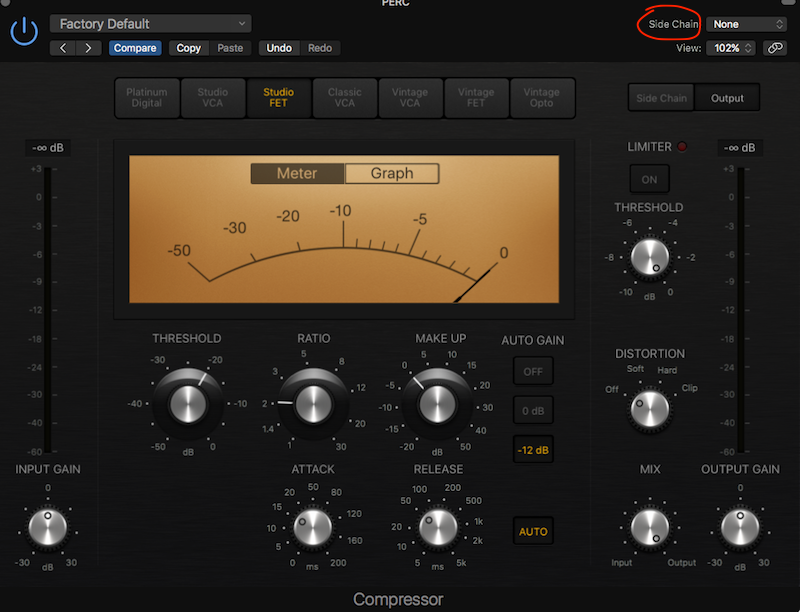
It varies from plugin to plugin, but the idea is the same. You’ll first need a compressor that supports sidechaining. The stock Pro Tools and Logic Pro X compressors earlier both include a sidechain input. Of course, other DAWs like Ableton, FL Studio, and Cubase also come with stock compressors featuring a sidechain.
The next step is to add the compressor the channel you want to compress. This will depend on what you’re trying to achieve, but for now we’ll stick to the kick drum/bass technique for the sake of simplicity. In this case, you’ll put the compressor on the bass track.
Next, you’ll need to set the sidechain input on the compressor. Depending on your DAW, you may have to create an auxiliary bus to do this. In Pro Tools, create a mono aux input, call it something obvious like “Kick Sidechain,” and choose an unused bus as its input. Route the output of the kick track to the input of the Kick Sidechain. Now, set the key (sidechain) input on the compressor to the Kick Sidechain bus.
Done correctly, the compressor should be receiving its input signal from the kick drum, while compressing only the bass track. You’ll want to adjust the compressor’s parameters to taste depending on how much you want to duck the bass every time the kick plays. Generally, a fast attack will work well for this technique, while the release depends on what you’re trying to achieve.

Other Sidechain Compression Techniques
Duck the Snare in the Overheads
This is another very useful sidechain compressor trick. If you record your overheads and you find that you have too much snare sound in them, you can simply set up a bus on the main snare channel. Send the bus to a compressor on the overheads. Now, every time the snare drum hits, it will trigger the compressor and duck the snare down in the overheads. When the snare is not playing, your cymbals will be uncompressed.
Duck the Guitar from the Vocals


This is a simple effect to set up. If you find yourself at the end of the song, and the lead guitar and vocal are both wailing away at the same time, this will help you mix them together. Send your vocal to a bus. Make that bus the key or sidechain input on a compressor that is on the lead guitar track. Now, when the guitar is playing and the vocals aren’t singing, the track will be out front. As soon as the vocal comes in, it will trigger the compressor on the guitar track and duck the guitar by an amount you set with the threshold.
Make Your Own De-Esser with Sidechain Compression
Before the days of de-essing plugins which are now incredibly handy, you could make a de-esser by sidechaining an EQ to a compressor. If you boost the highs on the EQ, those frequencies will be reduced when they hit the compressor’s threshold. Sibilance is really noticeable somewhere between 4 and 7 kHz, but you can also use a de-esser (or a makeshift, sidechained one) to tame some of the harshness of a vocal track. Sometimes setting a de-esser somewhere between 1 and 2 kHz can mellow out a harsh voice.
Create Maximum Room for the Vocals


If you find your vocals buried under a mountain of instruments, you might try sidechain compression to solve the problem. In the same way you’d sidechain the vocals to the lead guitar, sidechain them to any offending instrument in the mix. For example, you might put a compressor on the guitars and keyboards, using the lead vocal track as the sidechain input. Every time the lead vocals play, the keyboards and guitars will duck into the mix, leaving space for the vocal.
Noise Gate Sidechain: Add a Sine Wave to a Kick
If you feel as though your kick drum is a little anemic, giving it a boost with a sine wave is a common technique.
You start by setting up a sine wave generator on a new track. Somewhere between 20 and 60 Hz is typical, but be weary of adding too much sub as you approach 20. You can also set the sine wave to the song’s key. After you’ve set up your signal generator, place a noise gate right after it.
Instead of using sidechain compression, you’ll now be using a gate’s sidechain. Key the input to your anemic kick, and you’ll be on your way to a meatier, low end monster. You’ll want to adjust the gate’s parameters so that the sine wave only sounds when the kick drum triggers it.