
One factor in getting better sounding vocal takes at home is a DIY vocal booth. It doesn’t have to be fancy, and it especially doesn’t have to cost a lot of money. If your vocal recordings are suffering but you’re not exactly sure why, you’d probably benefit from more isolation in the form of a DIY vocal booth!

Why Do I Need a DIY Vocal Booth?
Most genres require the vocalist to be the most prominent element in a mix. Picture performers in a live setting: 9 times out of 10, the singer is center stage, commanding the audience’s attention. The same logic can be applied to vocal mixes. They should be up front, in-your-face, and bold.
You guessed it: the biggest hindrance to a “center stage” vocal mix are poorly recorded vocals. Untreated rooms with a ton of reflections are keeping you from getting the best vocal sound you can. A DIY vocal booth can solve much of that problem. It may not be pro studio clean, but it’s guaranteed to be leaps and bounds better than untreated room sound.
It’s easy to be fooled into thinking you can “fix it in the mix.” But that attitude should never get in the way of proper recording technique.
You can toss up a mic in any old room and hit record, but the end result will never be as good as you want it to be. There’s really no way to de-reverb or de-comb filter vocals recorded in a room with a lot of reflections. You can’t just “fix it in the mix.”
Better sounding vocals start with the right room, or in this case, a homemade vocal booth.
Types of DIY Booths
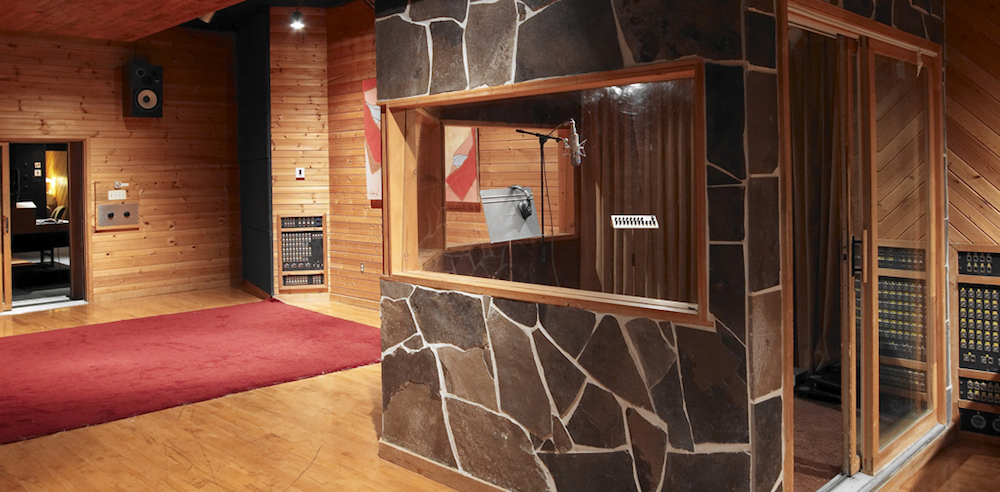
Treated Control Room
Most of us with home studio set-ups are only working with a single room. This means that our control room also serves as our live room or booth, and we’re tracking silently with both artist and engineer on headphones.
Your control room is going to double as a DIY vocal booth if you take some time to acoustically treat it! Even just treating the first reflections will really improve the space for mixing as well as tracking vocals. It doesn’t have to be complicated, and there are tons of options for absorption and diffusion, whether you build them yourself or purchase pre-built acoustic panels.
This is also the best way to go if you’re working with limited space. The other options are viable for larger control rooms.
Mattress Forts
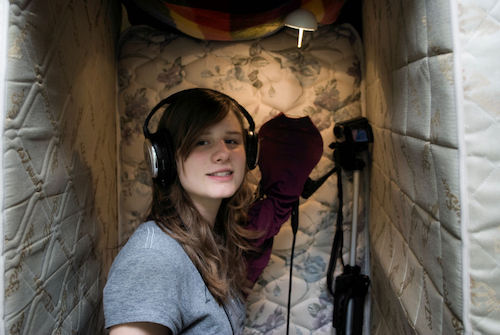

Mattresses are very effective at absorbing reflections. The biggest problem with the mattress booth, though, is that it’s a pain to set up, and you’re restricted by how many spares you’ve got lying around—probably not many!
If you’re willing to experiment, you can try different arrangements based on number of mattresses on hand. With one, toss it up behind the vocalist to absorb on-axis reflections. With two, you can arrange them in a V-shape to absorb some of the off-axis side reflections. With three, you’re in C-shape territory, with a mattress behind and on both sides of the performer. With four or more, you can add a “lid” to the fort for maximum absorption.
Is the mattress booth effective at absorbing reflections? Totally. Will it yield a more balanced vocal recording as a result? It will. Is it practical and easy to set up? Not so much.
Give it a shot if you’re willing and able, but it’s far from the all-around best option.
Pre-Fab Reflection Filters
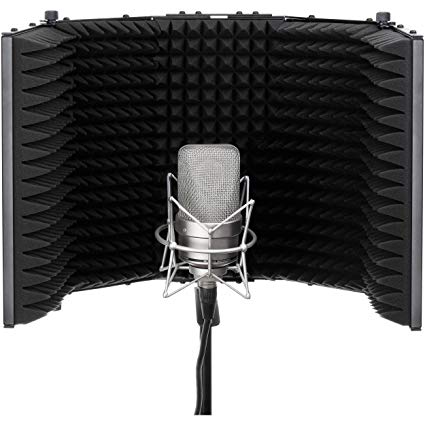

These are probably the least effective and most misunderstood/misused contraptions out there. We think they’re probably amazing because they’re professionally manufactured and cost around a couple hundred bucks, when in reality they’re basically expensive mic stand ornaments.
Made to be positioned behind the mic and in front of the vocalist, the reflection filter is ineffective for any mic that isn’t omni or bi-directional. This is because, at 180 degrees off-axis, your mic’s sensitivity is at its dullest, meaning you aren’t picking up any of those reflections anyway.
A better position for a reflection filter is behind the vocalist, where reflections coming from over the singer’s shoulder are on-axis entering the mic.
On their own, these are the least effective absorbers out there.
Blanket Booth
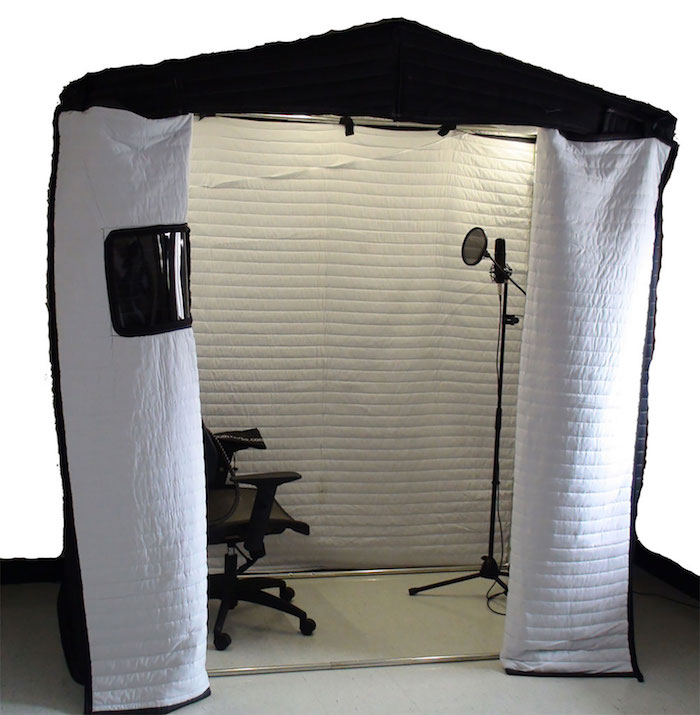

This is probably the best all-arounder as far as DIY booths go. It’s pretty cheap, doesn’t require too much assembly, can be broken down and taken on the go…and best of all, it covers the vocalist on all sides.
The blanket booth is essentially a PVC frame built to drape blankets over, creating a “room” for your vocalist to record. There are many different how-to’s detailing the build, and you can get as complex as you’d like.
I like my blanket booths as simple as they get. A sturdy PVC cube frame and several moving blankets are all it takes. Moving blankets are inexpensive, but you can spring for acoustic blankets as well.
What’s great about PVC is that the fittings don’t have to be glued to be sturdy, which means you can break down the booth for storage or on-the-go recording as necessary.
Of course, the vocalist is completely surrounded to absorb reflections at every angle, making it the best all-around DIY vocal booth.