

Recording acoustic guitar for the first time can be a challenge. Usually what kind of mic to use and where to put it are the two biggest hurdles for beginners when it comes to getting the best sound, but there are a lot of other factors affecting the recording as well. With these simple tips, you can learn how to record acoustic guitar with better results quickly!
Recording Acoustic Guitar for Beginners
Assuming you already have the equipment for recording, the next step is figuring out how to apply those tools. Before the advent of YouTube and online resources, engineers learned the craft through trial and error and by watching and talking to more experienced peers. That’s still an excellent way to advance your knowledge, but most of us are recording at home and not spending countless hours in a commercial studio with a mentor. Plus, so-called ‘bedroom recordings’ are the highest quality they’ve ever been—professional results are possible anywhere these days!
Like any acoustic instrument, the guitar can be fickle. Even by following these tips, it will probably still be a matter of experimentation to a certain degree. So don’t be afraid to get your hands dirty and just try things out for the sake of it!
1. Find the appropriate room
Before you even reach for a microphone, you’ll want to be sure you’re recording in an adequate space. In an empty or sparsely furnished room, you’re going to get a lot of reflections (it sounds like echoes). This can sound cool if you’re going for a reverb-y, distant sounding effect, but there’s no way to undo that in post.
In a room with a lot of furniture, like a bedroom or living room, the larger pieces like a sofa or bed are going to absorb a lot of those reflections. That means the guitar will sound more upfront and focused as opposed to echoey and ‘live.’ Most of the time, you’ll want to go for a more controlled recording because you can always add reverb and delays while mixing, but you can’t fix a poor recording with a ton of comb filtering and natural reverb.
If you do have a dedicated home studio space, a bit of acoustic treatment will go a long way and really help your acoustic guitar recordings sound great. As always, though, your ears and taste know best, so absolutely experiment by playing the guitar in different rooms and observing how it sounds.
- SEE ALSO: Acoustic Guitar Miking Techniques
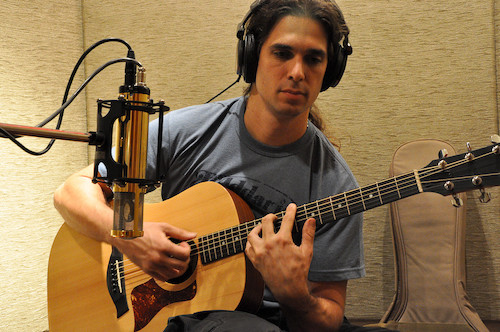
2. Make sure the player is comfortable
This is a big one, especially if you’re recording someone else. Comfort is going to ensure the best performance possible. You don’t want the guitarist to be contorted in an awkward playing position, or fighting to play the instrument in any way.
This comes down to seating and also how you position the microphone and mic stand in relation to the player (more on that later!). When you’re recording an artist, one thing you can do right away is have them settle in, then just ask them to start playing. Anything they want, don’t mind you, you’re just getting things straight. They’ll naturally end up in the most comfortable position for them, and from there you can start placing the mic in an unobtrusive way that doesn’t hinder their posture.
Make sure their headphones have plenty of slack on the cable too, so their head isn’t being yanked one way, and so there’s no cable in the way of their arm/hand.
3. Know your mics!
First off, don’t be deterred by whatever gear you have. It’s possible to record acoustic guitar and get amazing results with just about anything—you don’t need a specific mic to do that. You’ll just want to understand the basic differences between a dynamic or a condenser microphone as it pertains recording acoustic guitar.
Dynamic mics are robust and handle a ton of SPL. There’s less nuance in a dynamic microphone, so they’re not always the best choice for a delicate, finger-style part. However, a dynamic could work great on an aggressively strummed acoustic part.
Generally speaking, condensers are the most common mics for recording acoustic guitar. That’s because they capture sound more sensitively and in more detail than a dynamic microphone. Small diaphragm condensers are very frequently used on acoustic guitar because of the way they capture the high-end with such detail and clarity (that’s why they’re great for drum overheads, too!). Large diaphragm condensers are studio workhorses which are more than capable of achieving a fantastic acoustic guitar recording as well.
If you’re going to be recording a ton of acoustic guitar, definitely consider investing in a pair of small diaphragm condensers; it’s possible to do it affordably!
4. Mono vs. Stereo Recording

Another consideration is whether you want to record in mono (one mic) or stereo (two mics). There are different benefits to both, so it may just come down to the song/arrangement as well as what gear you have available.
Recording in mono is easy to set up, and you don’t have to worry about phase problems. Lots of times a mono acoustic guitar is used to beef up an arrangement, so it isn’t necessarily the lead rhythm instrument. If you only have one mic, you’ll obviously have to record in mono. But you can also double track your acoustic rhythms to recreate the width of a stereo recording if your song needs that extra heft.
Recording in stereo creates a wider image of the instrument with more depth—in a singer-songwriter track, for instance, you’d definitely want to record in stereo since the acoustic guitar is a primary instrument. Acoustic guitar sounds great miked in stereo, and you really shouldn’t encounter many phase issues using a tighter stereo technique like X/Y.
5. How to Record Acoustic Guitar: Mic Placement
Instinct tells us to point the mic straight at the guitar’s soundhole since that’s where the sound radiates from. If you try that, though, you’ll probably notice there’s quite a lot of low-end buildup that sounds muddy and undefined. And if the mic is placed right at the soundhole, and very close to it, the proximity effect from the microphone is going to make things even worse.
Mono
Our favorite mono mic placement at Produce Like A Pro, for a small diaphragm condenser, is pointed at the lower bout of the guitar’s body, angled slightly off to the side in the direction of the neck. It sounds great and just works about 90% of the time!
Another common place is between the 12th and 14th fret, anywhere from 6″ to a foot away. This works well with a large diaphragm condenser and captures the most balanced image of the acoustic guitar. If you’re going for a natural, intimate, ‘in-the-room-with-the-guitar’ sort of vibe, this is a definitely a position worth trying.
You can also try miking the body of the guitar in mono, a bit behind the guitarist’s picking hand near the bridge. Here you’re going to get a bit of that low-end heft we mentioned earlier, but hopefully not so much that it sounds bad. This can complement a sparse arrangement that benefits from a bit more weight in the bottom end.
Stereo
A/B and X/Y are going to be the most common choices for stereo miking acoustic guitar. You can reference our beginner’s guide to stereo technique for the finer details, but in an A/B arrangement you’ll end up combining the 12th-14th position and the body position mentioned above. Each mic gets panned hard left and right.
With X/Y, lots of engineers will position the microphones about where the neck meets the body of the guitar. One mic will pick up the high-end detail from the neck, and another will point towards the body and capture that weight and richness.
6. Maintain the instrument
Sometimes we overlook this basic step, but make sure the guitar is top playing shape prior to recording. That usually means new strings and a fresh setup. The worst thing you can do is battle a poorly set up instrument and try to get the highest quality recordings from it.
7. Keep nerves in check
This is easier said than done. Recording can be a nerve-wracking process. Your, or the artist’s, playing is really under the microscope, and it’s completely natural to feel anxiety because of that. And the more anxious someone feels, the more the performance is likely to suffer.
As an engineer, a big part of our job is to keep our client’s nerves in check, make them feel relaxed and comfortable, and reassure them. If you sense your artist is getting nervous or frustrated, remind them that you can edit small mistakes, comp takes, or re-record as many times as necessary. Double check that they’re seated comfortably, the mic isn’t in their way, and make any adjustments you have to in order to help them stay cool and in their best playing mindset.
Conclusion: How to Record Acoustic Guitar at Home
Realistically, there are more than just seven steps to recording acoustic guitar at home, and a ton of variables that will change from session to session. The most important thing to remember is that these are fundamental starting points to help you on your way to better recordings!