
The really interesting thing about Antares Auto-Tune is that just about everyone has an idea of what it is. For engineers, it’s a very useful tool and effect; but the fact that it’s recognized by almost everybody, beyond studio pros, says a lot about its impact on modern music. As an engineer or producer, you’ll want to learn how to use Auto-Tune in a couple different ways to make the most of one of the most popular pitch correction plugins ever made.
Auto-Tune is an example of pitch correction software. Generally, there are two main approaches with it. One is to use it as transparently as you can to nudge errant pitches in the right direction. The other is to use it as an effect, laying it on thick for the sound everyone knows.
Auto-Tune is the most popular type of pitch correction software. How does pitch correction work?
Most of us probably aren’t terribly interested in the technical aspects of vocal tuning. And really, we don’t have to be. As long as we know how to use our software to achieve the desired result, we know all we need to! That being said, there’s some interesting information behind how pitch correction operates.
At the most basic level, vocal tuning relies on a form of “phase vocoding.” A vocoder analyzes the amplitude of frequencies in a voice and determines the overall “shape” of a vocalist. The shape then controls a set of filters in the vocoder which are applied to an alternate signal. So, in traditional vocoding, the voice acts as a modifier of a wave shape or sound. In pitch correction, the voice works as a controller for a pitch shifted version of itself. The general principle behind traditional vocoding is responsible for the way vocal tuning software works.

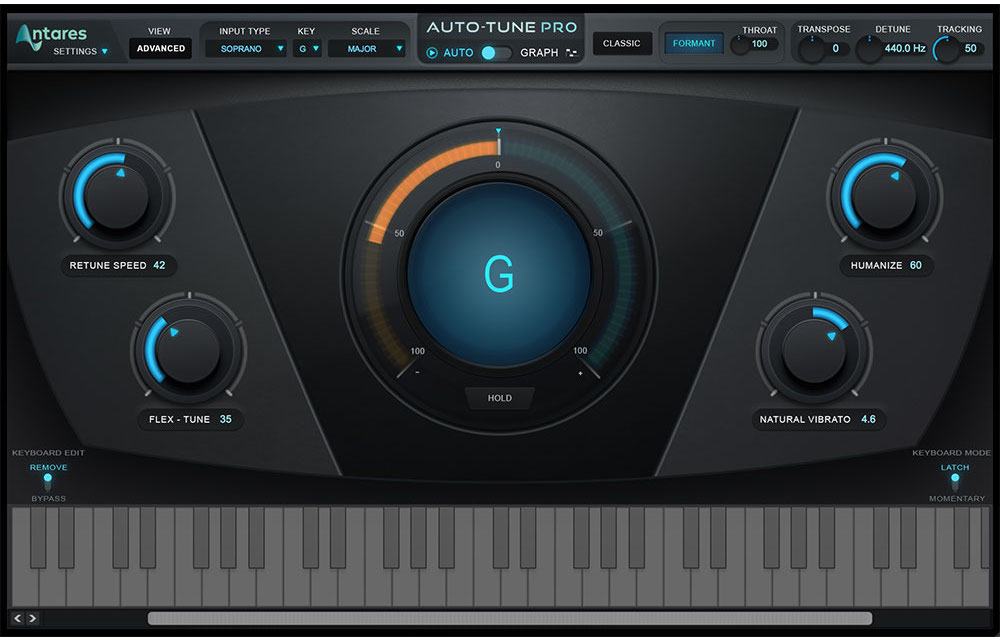
Auto-Tune might look complicated, but there are 3 main parameters you should focus on first.
- KEY. In order for Auto-Tune to work correctly, it must first be set to the key of the song. This might be very obvious to you, but don’t worry if it isn’t. Not all of us know music theory! The current version of Auto-Tune Pro comes with the incredibly handy Auto-Key plugin, which can determine the key of any track you put it on automatically. Otherwise, you can find keys manually by playing back the instrumental and going through keys on a piano (real, software, mobile app, etc.) until it sounds right.
- INPUT TYPE is the source you’re using Auto-Tune on. Antares gives you Bass Instrument, Instrument, Low Male, Alto/Tenor, and Soprano as input types. The first two are for, you guessed it, instruments, which you don’t have to worry about if you’re using Auto-Tune on vocals. Soprano is for singers in a higher register, while Alto/Tenor is a good middle ground for most voices. Setting the right input type will help Auto-Tune be more accurate and sound better overall.
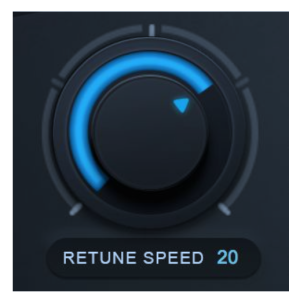
- RETUNE SPEED is where the magic happens, so to speak. It’s quite literally how quickly the plugin will latch onto a missed note and correct it. At 0, you have the highest amount applied for the robotic voice everyone is accustomed to. Lower retune speeds (the default is 20) are much more transparent.

How to Use Auto-Tune for Transparent Vocal Correction
After setting the correct key and input type, your main parameter to worry about is Retune Speed. If you have a great vocalist and aren’t going for the Auto-Tune effect, slower Retune Speeds are where you’ll want to be.
Start with the default speed of 20, and adjust to taste. If you’re still hearing lots of the Auto-Tune effect at 20, try going slower until you achieve the desired result.
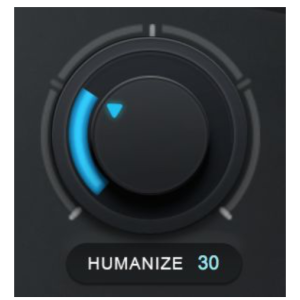
The Humanize function is also quite helpful for adding realism to sustained notes. Normally, to get short notes in key you’ll be forced to use shorter Retune Speeds. Humanize is sort of a compensation for that, which helps to smooth out and naturalize quick Retune Speeds.
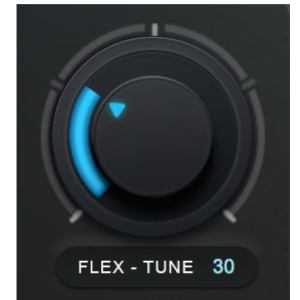
Additionally, you can make use of Flex-Tune. With Flex-Tune at 0, Auto-Tune is always pulling every note toward a target scale note. Flex-Tune makes it so Auto-Tune only pulls as the singer approaches the correct note. Try turning up Flex-Tune to preserve a singer’s expressiveness.
How to Use Auto-Tune as an Effect (Robot Voice)
Set the Retune Speed to 0. Voila.
Seriously though, there are lots of misnomers about what Auto-Tune can do. The plugin doesn’t work miracles. In other words, it won’t turn a monotone performance into a melodic marvel, and it won’t make a bad singer sound amazing. A bad singer will actually sound worse with Auto-Tune many times, because the software is working overtime trying to correct bad pitches.
You can make the most of Auto-Tune and its very popular stylized “robot” effect when you have a capable vocalist getting their pitches at least in the ballpark, if not near dead-on, with a super fast Retune Speed.