

We’re going to do another part in our mixing basics series!
In this series, we are mixing a song completely and utterly in the box using only stock plugins. So far we’ve worked on the vocal, bass, and drums. I’m sure you can guess what we’re working on today based on that and the title. – haha.
Check out our previous episodes from the Mixing basics series below.
The Basics of Starting a Mix – Setting Levels
Mixing Basics: Vocal Compression
The song we’re using is called “The Owl Song” by Me and The City, there are a couple of guitars in this song, a few acoustic and electric guitar parts.
Before we get started don’t forget that you can download these multi-tracks and work along with me. We’re staying completely stock and we’re not using any fancy emulations. You can do this with any DAW, we’re using the stock EQ, Compressor, De-Esser, Reverb, and Delay. No fancy plugins that you have to buy will be used during this series, you can do all of these using the compressors that you already have in your DAW!
Me and The City are a Indie/Folk band out of Southern California. What started as a one man project, Me and the City has grown into a 4 person adventure. Having a unique sound of both electric and acoustic elements that can’t be described with one word, they have crafted a unique experience both on and off the stage.
Download Me and the City – “Owl Song” Multitracks here

The main driving force in this song is actually a pair of acoustics that were recorded with some Lewitt LCT 140’s which are fairly inexpensive microphones. There is a little bit of compression going on the way in so they are sort of in the ball park.
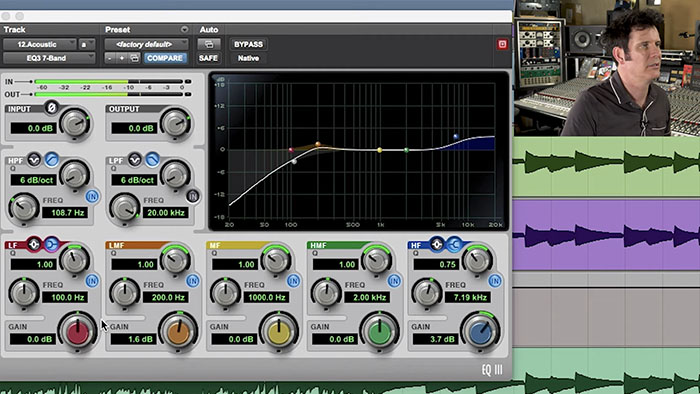
After taking a listen to the first thing you may notice is a little bit of excessive low end, but only a tiny bit. What I’m going to do just to get it out of the way of the bass, since the guitars are panned hard left and hard right we’re going to grab a stock EQ plugin.
Since it isn’t a fancy plugin there are no visual indicators of the frequencies like other flash modern plugins do, but we can use our brain here. If we bring the high-pass up to around 100-ish. If we go in and out of bypass you notice that there is not a huge volume difference.
What we can do is maybe comp it around 200 and give it a little bump in low end. There is actually more low-end now because I’m finding the fundamental at the bottom of the acoustic at around about 200.
So what we’re doing is High-passing the super lows out which don’t mean anything and then boosting some of the low-end at about 200. This make the acoustic sound slightly fuller so I copied the EQ down onto the other acoustic.
What I’ve done there is boosted about 200, cut 100 and below, got it out of the fundamental of the bass, and the acoustic still sounds nice and fat. It actually sounds as if it has more low end even with that cut in it.
Watch the full Mixing Basics: Guitar Episode below:
