
There are a ton of variables at play when it comes to at-home guitar recording. The whole process is a combination of many elements, so if you’re struggling with how to record electric guitar with the best results, you’re definitely not alone.
Fundamentally, a great guitar recording requires the right tone—and tone requires taste. If you haven’t yet developed an ear for good tone, then your sound may not translate well on a recording.
If you’ve been playing guitar for a long time, however, there’s a good chance you’ve established a tone you like. The next step is being able to take that sound—which you’ve probably only heard in the room where you play—and recreate it on a recording.

Recording electric guitar at home necessitates compromise.
Most of us are limited with what we can do in our home studios; this means that we’ll be making sacrifices along the way to a great guitar recording.
Obstacle #1: Volume
Can you really dime your 100-watt tube amp at home? Most of us don’t have an isolation booth that can handle the insane volume it takes to get an amp to really shine.
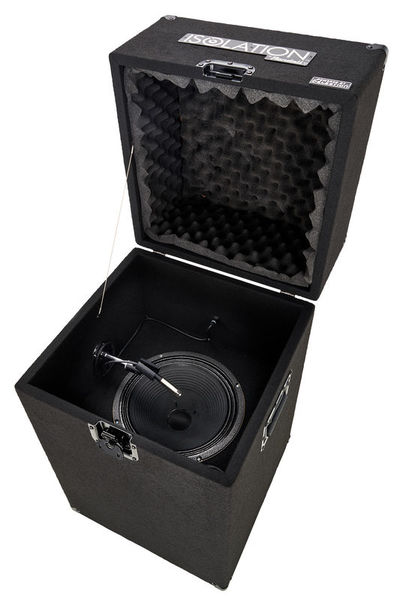

A way around this is to build or purchase an isolation cabinet, which is a soundproof box loaded with a speaker of the guitarist’s choice. A microphone can be suspended inside the cabinet to capture the output for recording. Iso cabs can be pricey, but if you’re willing to make the investment you’ll spare you and your neighbors a heck of a lot of problems.
Alternatives
Lots of newer tube heads are built with a direct out you can take straight to your interface for recording. Coupled with a cabinet IR, you can get your amp’s tone you love at a reasonable, or silent, level.
Another option is using an attenuator with your amplifier. An attenuator will let you crank your master volume to cook the tubes while keeping overall levels low.
The other alternative, of course, is using amp sims. Hardware like the Kemper profiler or Axe-FX are fantastic for recording because you can take their output straight to your DAW and monitor through your headphones or speakers without excessive volume being an issue. Logic Pro X even comes with a stock amp designer which is capable of incredible tones, and there are a million incredible sounding plugins out there specifically designed for affordability, quality tone, and ease-of-use.
- Related: Best DAW for Beginners
Obstacle #2: Budget
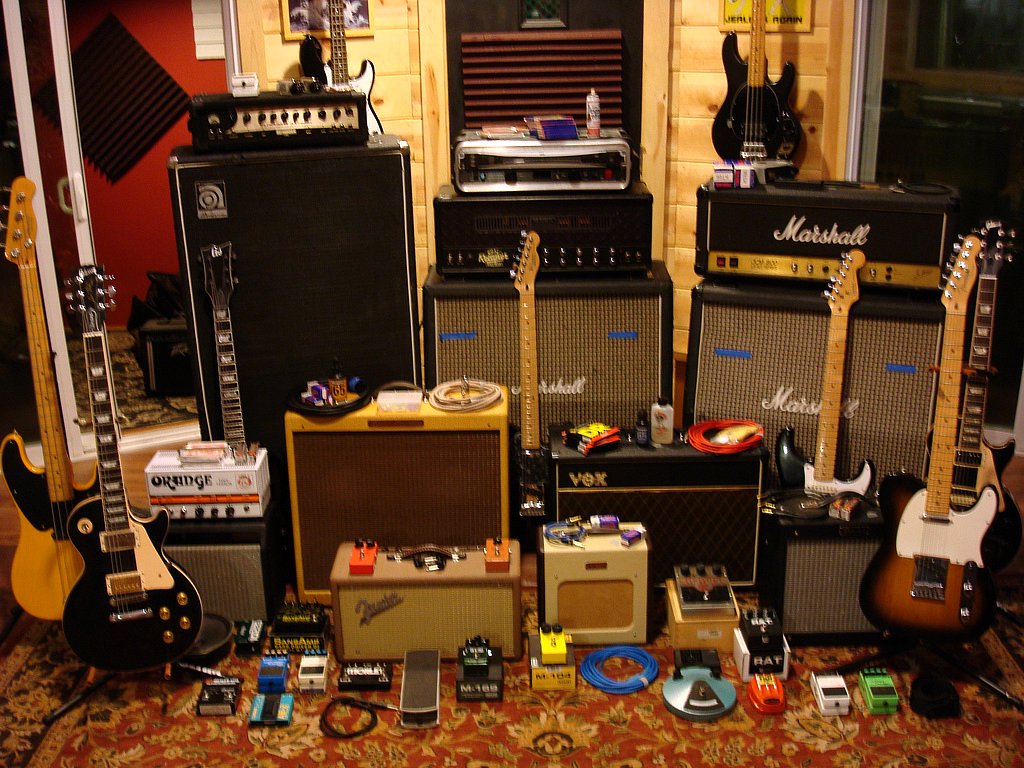
Let’s assume for a second that maybe you don’t have your holy grail tone established. You’d love to record guitar at home, but your practice amp simply doesn’t sound that great. Amps, cabinets, pedals, and guitars aren’t cheap!
Getting It Done on a Budget
You can make an affordable guitar play and sound fantastic by having it properly set up. From the factory, most lower end guitars are pretty poorly set up, so they’re hard to play and don’t sound their best. Maintenance is one of first things to consider before recording electric guitar—new strings, proper intonation, etc.
Another affordable upgrade to a budget guitar is swapping the pickups. Pickups are basically microphones, and they’re the first transducer in the entire signal path! Getting a great set of pickups will help your tone tremendously.
Finally, amp sim plugins are your best friend if you’re on a budget. Rather than spending $3000 on an amp and cab rig, you can spend a couple hundred on a plugin. This will also save you from the volume issue previously mentioned.
How to Record Electric Guitar
With an Amplifier and Cabinet
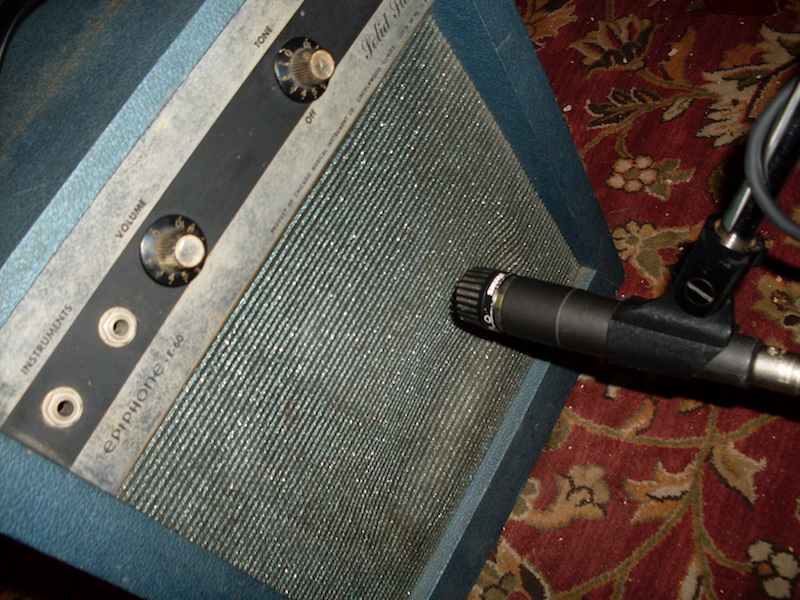
If you do have the option of recording traditionally through an amp, you’ll need to have some basic miking skills. Firstly, the SM57 is a longtime industry standard on guitar amps/cabinets. It’s also very affordable and virtually indestructible. Dynamic mics are preferable on guitar amps because they can withstand high SPL. Plus, you don’t need all the high end detail that a condenser mic would capture on an electric guitar.

If there’s more than one, you can start by selecting the best sounding speaker in your cabinet. It’s best to try each of them out and pick your favorite for the final recording.
Shine a flashlight in your cabinet to find the cone, and place the microphone slightly to one side of the center of the speaker cone. This is common placement, but you can experiment with what sounds best to you! Most of the time, putting the mic directly in the center of the cone will give you a brighter, more aggressive sound, while moving it slightly to the side of center darkens and balances the tone out. Mic technique is a fundamental part of knowing how to record electric guitar; it can drastically change the whole sound, so don’t be afraid to experiment!
Using a Direct Out from an Amp
As we mentioned earlier, modern amps are coming loaded with direct outs for convenient home recording. Simply run an XLR from the direct output to your interface. The amp should have a dummy load which means it doesn’t have to be connected to an external cabinet.
From there, you may have to load up a cabinet IR unless your amp simulates one as well. Third-party IRs usually sound way better than whatever your amp has onboard, so do a little bit of research and find replicas of your favorite cabs. The Marshall 1960A, Orange 4×12, and Mesa 4×12 are all ubiquitous cabinets that have been turned into IRs for in-the-box studio use.
Using Amp Sim Plugins
This is really the simplest way to record guitars. Plug your guitar directly into one of the inputs on your interface and open an instance of the plugin on a track in your DAW. From there, you can monitor your signal and tweak the tone on the plugin until it sounds good!
Other Tips: How to Record Electric Guitar
There are basically three main ways to record electric guitar that we covered above. You can obviously go the amp and microphone route, or you can take a direct output from the preamp if there is one. Finally, you can go direct into your audio interface and use amp sim plugins to establish a quality tone.
From there, it’s primarily about experimentation, patience, and making sure you’re serving the song! Here are some other tips to be aware of.
1. Context is key.
Your tone in the room, isolated from a mix, isn’t necessarily the same tone that’s going to sound good recorded. Keep context in mind, and make sure you’re dialing in a tone that works for the mix, and not one that sounds great just by itself.
2. Double track your rhythms.
Double tracking rhythm parts is pretty standard. What that means is you record the same part twice and pan each of them hard left and right. This creates a ton of width and dimension you just don’t get with a single take. One thing to keep in mind is that you really do need to perform two different takes; you can’t just duplicate one part and pan it for the same result. Whenever you duplicate something you’ll just end up with a louder version of it, whereas the subtle differences between two different performances are what makes something sound wide and huge!
Some folks will take this a step further and quad track their rhythms—maybe even throw one more take down the center for good measure!
3. Use more than one tone.
We talked about double tracking above. You can take that a step further and use different tones for each part. They obviously don’t have to be wildly different; that wouldn’t sound very good! But just changing things up slightly can create some cool variation and make your guitar parts sound absolutely massive.
4. Keep it dry.
Unless there’s a very specific reason to, you’ll probably want to keep your tone relatively dry for recording. You can always add reverb, delay, flanger, phaser, or any other effects later on while mixing. It would be frustrating to record this awesome, wet guitar part only to find realize that half of the effects you printed are fighting for space in the mix. Or maybe a delay isn’t quite in time with other elements. There are a ton of variables here, so when in doubt, keep the signal dry and add effects in-the-box.
5. Record direct with amp sims.
Honestly, for the best results at home, just use an amp sim! Recording electric guitar amps is tough for the various reasons we talked about earlier. By going direct and using plugins, you’ve opened up a whole world of possibility. Think about it—you have this totally dry direct signal that you can manipulate to no end. If for some reason halfway through mixing you hate the tone, you can completely change it with zero limits. You don’t have that luxury when you record an amp.
Conclusion
No one ever learned how to record electric guitar without a little trial and error, so just hop in there and try some stuff out! Beyond the basics of getting set up, the real challenge of recording guitar comes from trying to nail the right takes. With a little time and patience, though, you’ll be riffing with the best of ’em.
READ ALSO: SSL Native X-EQ 2 Review
READ ALSO: Inspired Acoustics Inspirata Reverb Review
READ ALSO: Splice Sounds Review