
We’ve talked a lot about how to use a compressor in various stages of the recording and mixing processes. The best way to learn is to get your hands dirty, which you’ll be able to do with some of these intermediate compression techniques!
Multi-Stage Compression
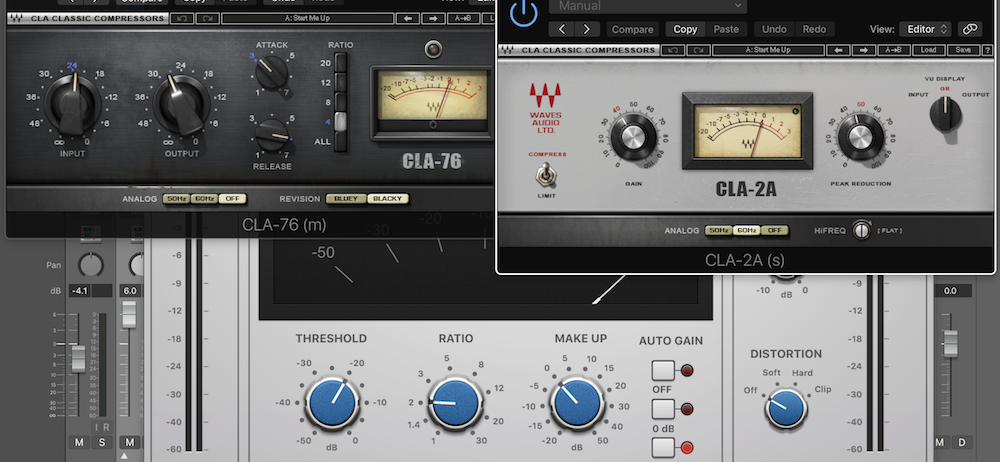
Multi-stage compression is really useful for keeping your tracks sounding natural. The basics of multi-stage compression involve using multiple compressors each applying a few dB of gain reduction rather than a single unit getting slammed by the input source.

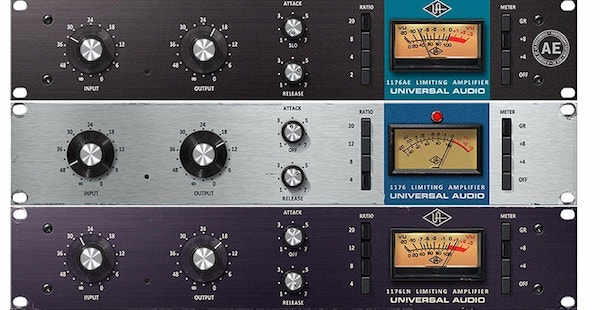
On a vocal, for instance, you might start with a fast compressor like an 1176 to tame the sharpest peaks in the dynamic range. After this initial stage of compression, you could use a slower compressor like an LA-2A to “glue” everything together as we so like to do!
Parallel Compression
Parallel compression is a go-to technique to push a track forward and make it sound bigger or more aggressive. It’s been used since the ’70s to achieve more punch in a natural sounding way. It often sounds more complicated than it really is, so don’t be afraid to try it out!
In your DAW, make a copy of the track you want to parallel compress and put a compressor on it. You’ll want to hit it hard, so exaggerate your compressor’s settings even to the point in which it doesn’t sound pleasant and starts to distort.
Make sure the original track is at the desired level, and bring up the compressed copy’s fader until it sits just beneath the original. Parallel compression gives the impression of control without sounding completely squashed. It’s a fantastic way to compress vocals, but works with almost any individual instrument, too!
Sidechain Compression
Also called a “key” input, a sidechain is simply a separate input into the processor. It’s uses are varied, which we’ll start to dig into below. Mainly, though, you’ll use sidechain compression when you want to duck a signal away from another one to make more space in your mix. You can try some of the following common sidechain techniques:
Sidechain the Kick to the Bass
This is common technique in most genres, whether you’re using a bass guitar and acoustic drums or kick samples and bass synths. When low-end heavy mix elements are fighting for space, it’s easy to give them a little help with sidechain compression. You start by putting a compressor on your bass track and keying its input with the signal from the kick.
Setting the right attack and release is crucial, because this will dictate how the bass ducks when the kick hits. You don’t want to be sucked so far down into the mix that it’s extremely audible. Rather, a subtle downward push to make way for the kick is preferable.
Read Also: Diatonic vs Chromatic: What Is a Diatonic Scale?
Read Also: Ableton vs FL Studio: Which DAW Is Best?
Read Also: 9 Best Mellotron Plugins
Sidechain a Sine Wave to a Kick
If you feel as though your kick drum is a little anemic, giving it a boost with a sine wave is a common technique.
You start by setting up a sine wave generator on a new track. Somewhere between 20 and 60 Hz is typical, but be weary of adding too much sub as you approach 20. You can also set the sine wave to the song’s key. After you’ve set up your signal generator, place a noise gate right after it.
Sidechain Guitar to the Lead Vocal
This is a simple effect to set up. If you find yourself at the end of the song, and the lead guitar and vocal are both wailing away at the same time, this will help you mix them together. Send your vocal to a bus. Make that bus the key or sidechain input on a compressor that is on the lead guitar track. Now, when the guitar is playing and the vocals aren’t singing, the track will be out front. As soon as the vocal comes in, it will trigger the compressor on the guitar track and duck the guitar by an amount you set with the threshold.
Multiband Compression

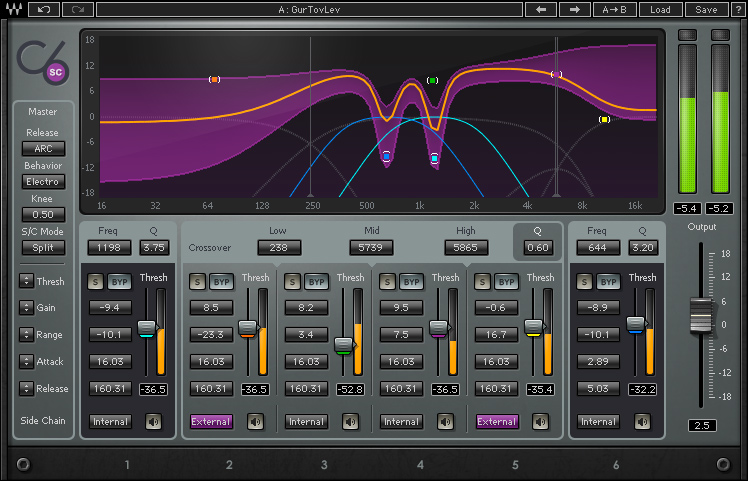
A multiband compressor works the same way a regular one does, with one key difference: multiband compressors work on a specific set of frequency ranges—not the whole track. We’ve included a handy breakdown of compression parameters at the end if you need a refresher. You’ll find that a multiband compressor shares many of these exact same parameters with regular ones as well.
Before applying a multiband compressor, you should have a clear purpose.
Multiband is one of these tools that can absolutely destroy a track or a mix very quickly. GRAMMY-nominated mastering engineer Michael Romanowski even told us you shouldn’t use it at all if you plan to send your mix to be mastered by someone else! Multiband can really “slam” things or even suck the life out of a track. On a mix bus especially, you can run into a lot of trouble with pumping and things sounding downright awful. So before you use a multiband compressor, you’ll want to decide what you’re trying to achieve.
READ ALSO: The Inspirata Reverb Review
READ ALSO: Beyerdynamic DT 770 Headphone Review
READ ALSO: Who Makes the Best Guitar Stands?
The Basics of Multiband Compression
- To control dynamics
- To control frequencies
The first approach uses multiband like a regular compressor, but for specific frequencies as we’ve mentioned. Think of it like this: let’s say you wanted to even out the lowest frequencies in a kick drum, up to about 200 Hz. With multiband, you could apply compression from 0 to 200 Hz, evening out the low end to make it consistent. Applying additional makeup gain on the chosen frequency band will make it stand out, so you’re left with a hard-hitting and even kick sound in the low end.
The second approach to multiband compression is using it to tame unpleasant frequencies. You could use an EQ and notch for days, but you might also be removing some of the naturalness of an instrument or causing unwanted phase problems in the long run. With a multiband compressor, you can tame harsh frequencies only when they become a problem. You’re not removing them outright, but instead tucking them in when they surpass the threshold. In this case, you wouldn’t want to apply any makeup gain—we’re turning the nasty parts down!
