Unwanted noise tends to creep into our recordings. Sometimes it’s in the form of electrical buzzing, and sometimes it’s a consequence of sound sources bleeding into one another (especially on drums!). A noise gate is a helpful audio processor that cuts out signals we don’t want in our recordings or live sound reinforcement set-ups.
What does a noise gate do?
Noise gates work conversely to compressors. While the latter attenuates a signal above a chosen threshold, the former will attenuate signals below a chosen threshold. Their sole purpose is to control excess background sounds or leakage from other instruments in a recording or live situation; unfortunately noise comes in all forms, making these tools very handy under the right circumstances.
Gates ‘close’ when the input signal falls below the set threshold, cutting off the sound entirely. The gate then ‘opens’ when the input signal surpasses the threshold to allow the sound through. This means they turn ‘on’ while the source is not playing, and they turn ‘off’ while the source is playing.
Think about recording a vocal, or any instrumental part, where there are long gaps between phrases. You might pick up headphone bleed or excess breaths/mouth noise. You can place a noise gate in the signal path and set the threshold so that any time the input signal falls below a certain level, the gate comes on and removes the excess noise in the recording.
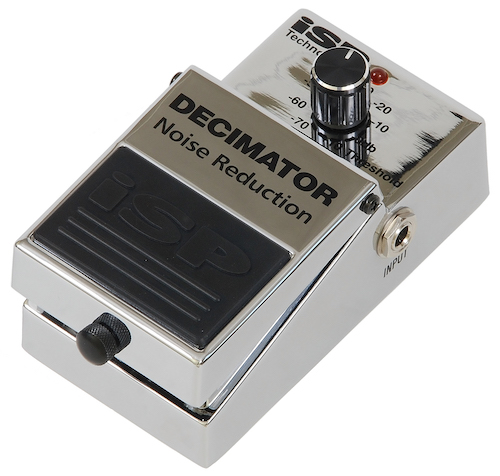
In today’s world, the most common gates are plugins in our DAWs. Guitar pedals are also one of the most common types of hardware gates.
READ ALSO: Best Speakers for Vinyl Record Player
READ ALSO: Best Computer for Music Production in 2022
What does an expander do?
A noise gate is a type of downward expander. Expanders in general increase the dynamic range of a signal. Upward expanders amplify the level of the signal that surpasses the threshold, while downward expanders attenuate the level of signals falling below the threshold.
Downward expanders still increase the dynamic range, but in the opposite direction we’d expect. They make the quiet parts of the signal (the noisy bits) even quieter.
Setting a Noise Gate
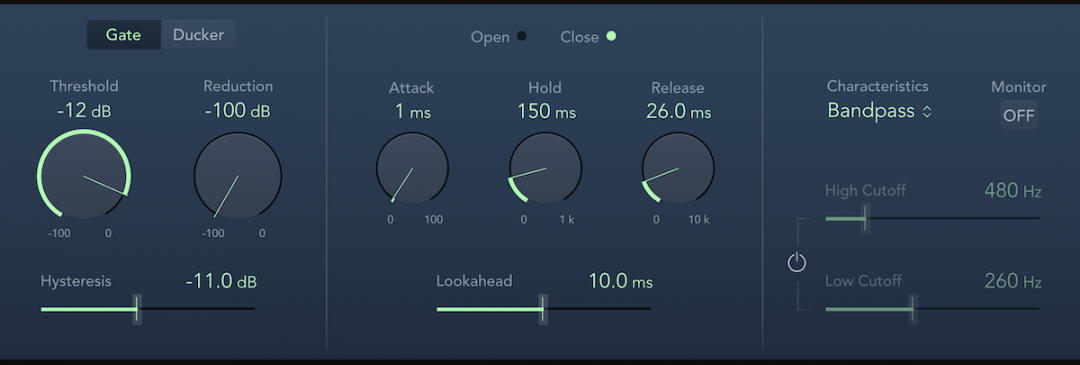
There are four primary parameters on a noise gate which should already familiar already if you’ve used compressors before:
- Threshold: determines the level at which the gate will open to let the input signal through
- Attack: defines the length of time the gate takes to change from closed to fully open.
- Release: defines the length of time the gate takes to change from open to fully closed. A fast release abruptly cuts off the sound, whereas a slower release smoothly attenuates the signal from open to closed, resulting in a slow fade-out.
- Hold: defines the length of time the gate will stay fully open after the signal falls below the threshold, and before the release period ends. The hold control is often set to ensure the gate does not close during short pauses between words or sentences in a vocal signal, so nothing gets unnaturally cut off.
Where does a noise gate go in the signal chain?
This is an excellent question and can vary depending on the instrument. When in doubt, though, simply put the gate directly after any unwanted noise in your recording.
Vocals
Vocals tend to go through multiple stages of processing with compressors, EQ, and perhaps some creative modulation thrown in as well. The sum of all these, especially with compression, can increase the overall noise level in the signal. In a situation like this, you’d place the noise gate at the end of the signal chain, before any reverb or delay sends.
Guitar
Guitar is one of the instruments that gets the most benefit from a gate. They’re actually used somewhat creatively in certain genres like progressive metal to achieve an ultra-tight, palm-muted staccato sound for riffing.
Again, the short answer for where to place it in the signal chain is after anywhere there’s noise. For a high-gain rhythm or lead tone, this is probably near the beginning of the signal path after the preamp distortion which introduces the most noise into the signal. It could also be after any noisy pedal in your chain, such as a fuzz or overdrive.
Some guitarists put a noise gate in the effects loop of their amp, but you have to be careful not to cut off any reverb/delay you may also have in the loop—place it before those effects so the tails don’t get chomped on.
Drums
Drums suffer from microphone bleed/leakage more than any other instrument. No matter which part of the kit you’re listening to, you’re going to hear the rest of it. Common practice is to put a noise gate at the beginning of the chain, before any other effects, to attenuate the bleed and make sure you’re emphasizing whichever piece of the kit is miked.
Noise Gate Tips
Here’s the #1 tip for using noise gates: do manual edits first. (Maybe even instead of a gate altogether!). We don’t have to slice tape anymore; we can do hundreds of precise edits in minutes. Pro Tools’s Strip Silence feature, for instance, lets you remove all the noisy gaps in a clip in seconds.
It’s just a good habit working in a DAW to manually edit your audio for the cleanest recording you can possible get.
- SEE ALSO: Noise Gate Tips for Cleaner Mixes
- SEE ALSO: What Is Noise Floor
- SEE ALSO: Ways to Make Money in Music in 2022