In Part One of our jazz recording session at Salvation Studios in Brighton, we looked at the importance of capturing musicians playing together as a real ensemble.
For Part Two, Sean Genockey takes us much deeper into the technical side of the session. He explains his microphone choices, room placement, phase relationships and why he decided to record the trio using two very different approaches.
The musicians featured in the session are:
Lior Solomons-Wise on piano Noam Solomons-Wise on drums Edouard Le Feuvre on double bass
You can also download the free multitracks from the session here and experiment with Sean’s microphone choices and two contrasting recording approaches yourself.
The first setup gives Sean plenty of separation and control for mixing. The second places the musicians much closer together with fewer microphones, more room sound and a greater emphasis on natural interaction.
Recording the Piano
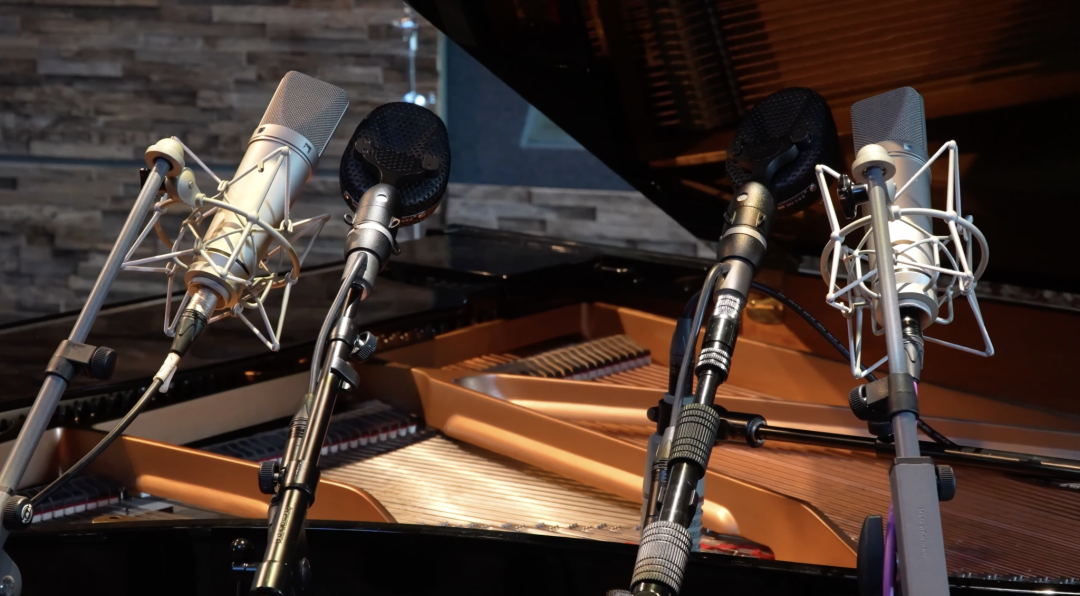
The piano setup may look elaborate, but every microphone has a specific purpose.
Sean combines Neumann U 87s with Coles ribbon microphones positioned extremely close to one another. Keeping the capsules close helps minimise phase problems and allows the two different microphone characters to work together naturally.
The U 87s provide clarity, detail and openness while the Coles ribbons bring warmth, weight and a smoother tonal balance. Rather than choosing between them, Sean can blend the microphones to capture a fuller representation of the piano.
A piano is an incredibly complex instrument to record. Its sound contains a huge range of harmonics, overtones and mechanical information. Close microphones can easily exaggerate certain notes or make the stereo image feel unnatural.
Sean has developed this setup specifically for the piano and room at Salvation Studios. It is a tried and tested technique that allows him to set up quickly and know that the result will work.
There is no EQ or compression on the main piano microphones. The sound is created through placement, microphone choice and the natural character of the instrument and room.
Using an RE20 for Piano Solo Lifts
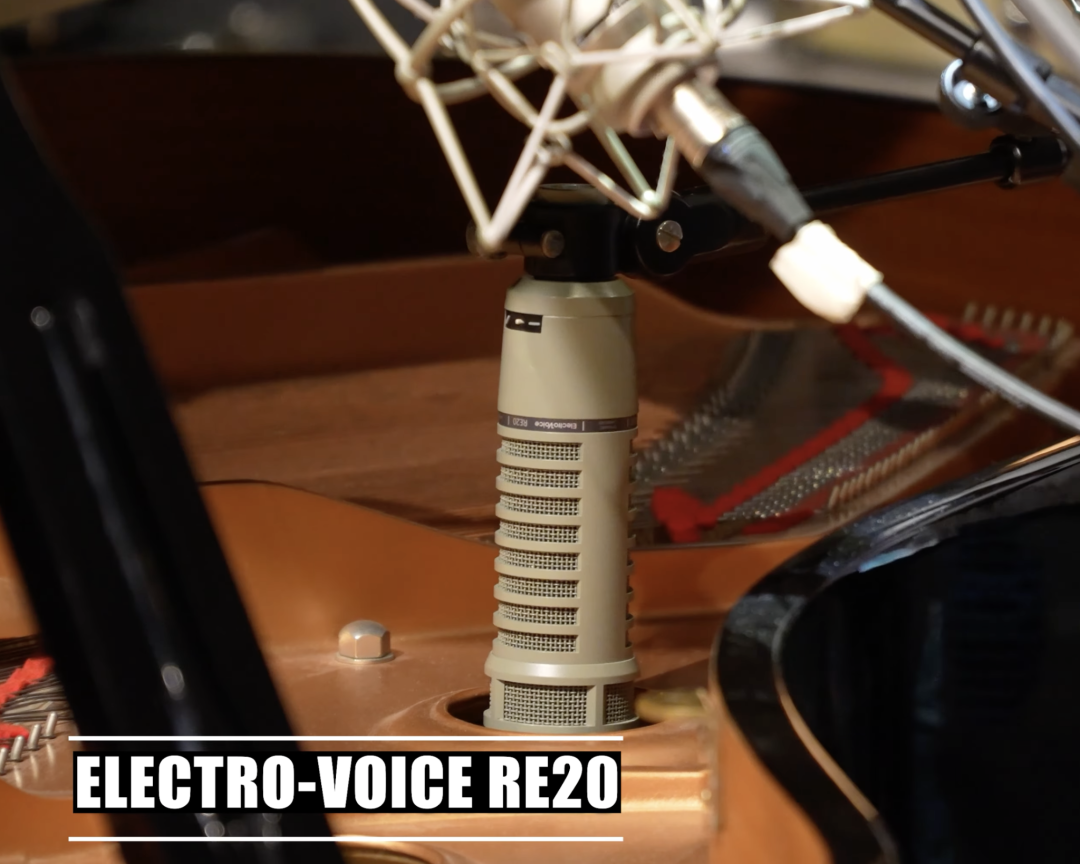
An Electro-Voice RE20 is placed close to one of the piano’s sound holes.
On its own, the microphone sounds extremely aggressive and heavily compressed. Sean runs it through an 1176 with all four ratio buttons engaged.
It is not intended to provide the main piano sound. Instead, it acts almost like an effect return that can be brought forward during solos or important musical moments.
Rather than simply turning up the entire piano group, Sean can ride the RE20 into the mix. This changes the tone and energy of the piano without making the overall level feel unnaturally louder.
It is a clever way of creating excitement through tonal contrast.
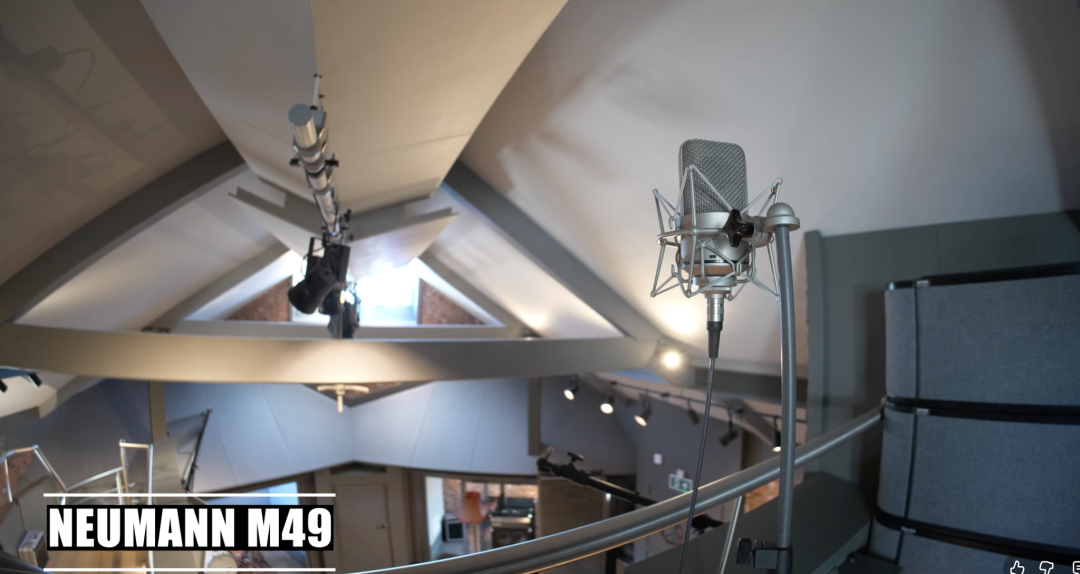
Capturing Natural Piano Ambience
A pair of Neumann M 150 omnidirectional microphones is placed high in the room.
These microphones capture the natural reflections and ambience around the piano. Instead of relying entirely on artificial reverb later, Sean records the sound of the actual space.
Room microphones can provide depth and realism that is difficult to recreate with a plug-in. They also help establish a believable sense of distance between the listener and the instrument.
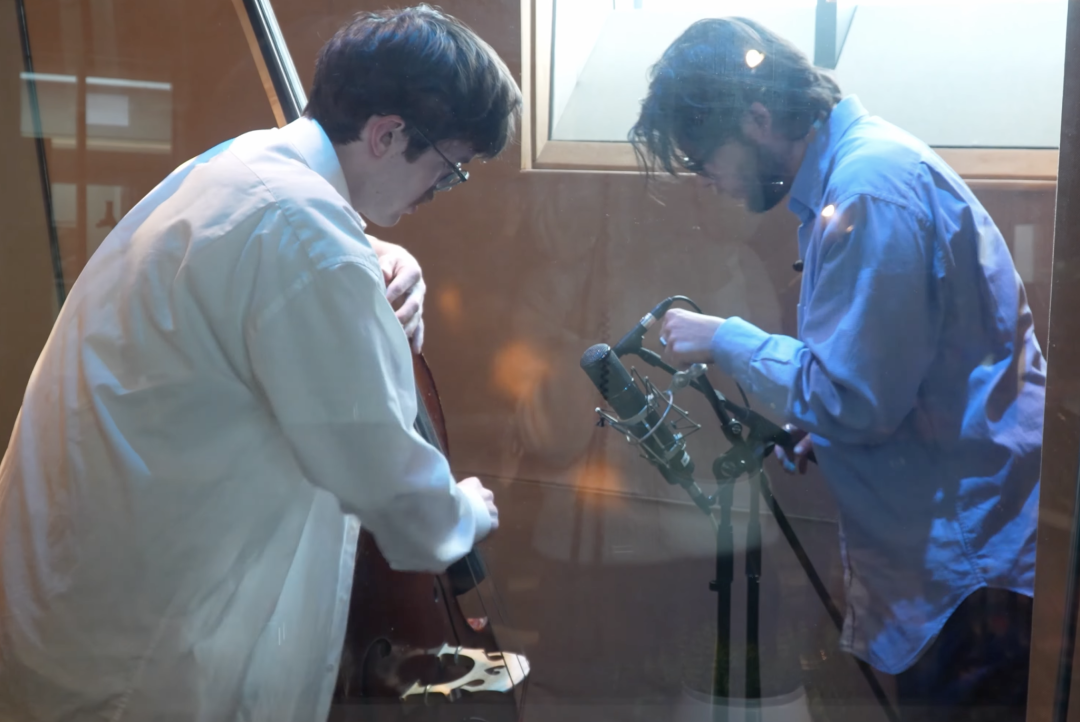
Recording the Double Bass
For the first setup, the double bass is placed in a separate booth.
Sean had previously recorded the bass in the main room, but discovered that compressing the bass microphones during mixing also altered the low end of the piano because of the bleed.
Moving the bass into the booth gives him more control while still allowing the musicians to maintain eye contact.
That visual connection is essential. Jazz relies heavily on communication, timing and reaction. Isolation is useful, but it should never make the musicians feel disconnected.
The Salvation Studios layout makes it possible to achieve separation without sacrificing line of sight.
Combining Two Bass Microphones
Sean uses two contrasting microphones on the double bass.
The first is a DPA small diaphragm condenser. It captures detail, attack and the percussive qualities of the strings.
The second is a tube microphone with greater low-frequency extension and a broader dynamic range. It captures more of the body, resonance and weight of the instrument.
Together, the microphones provide control over both the articulation and the deep fundamental tone of the bass.
The double bass can be a particularly difficult instrument to record. It produces sharp string noise, woody midrange information and extremely deep low frequencies. Sean’s approach is to capture those characteristics honestly rather than trying to solve everything through heavy EQ and compression.
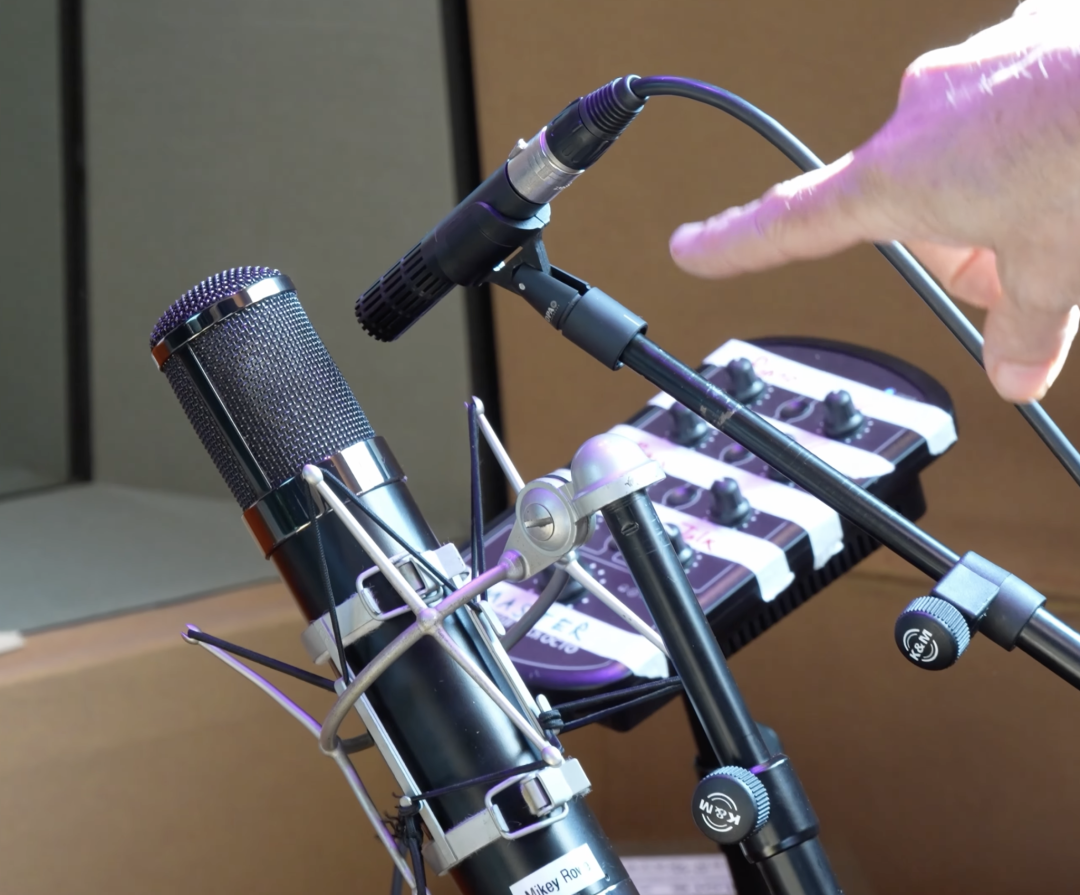
Placing the Bass Preamps Near the Instrument
One particularly interesting decision is the placement of the microphone preamps inside the bass booth.
Instead of sending a low-level microphone signal through a long cable run to the control room, Sean amplifies the signal close to the instrument and sends a line-level signal back to the console.
He feels this provides a stronger frequency response with less noise, particularly when recording an instrument with such deep low-frequency content.
The bass microphones feed vintage Rosser microphone preamps followed by a Roger Mayer passive transformer-based EQ. The EQ provides additional low-frequency character and enough level to send a strong signal through the long cable run.
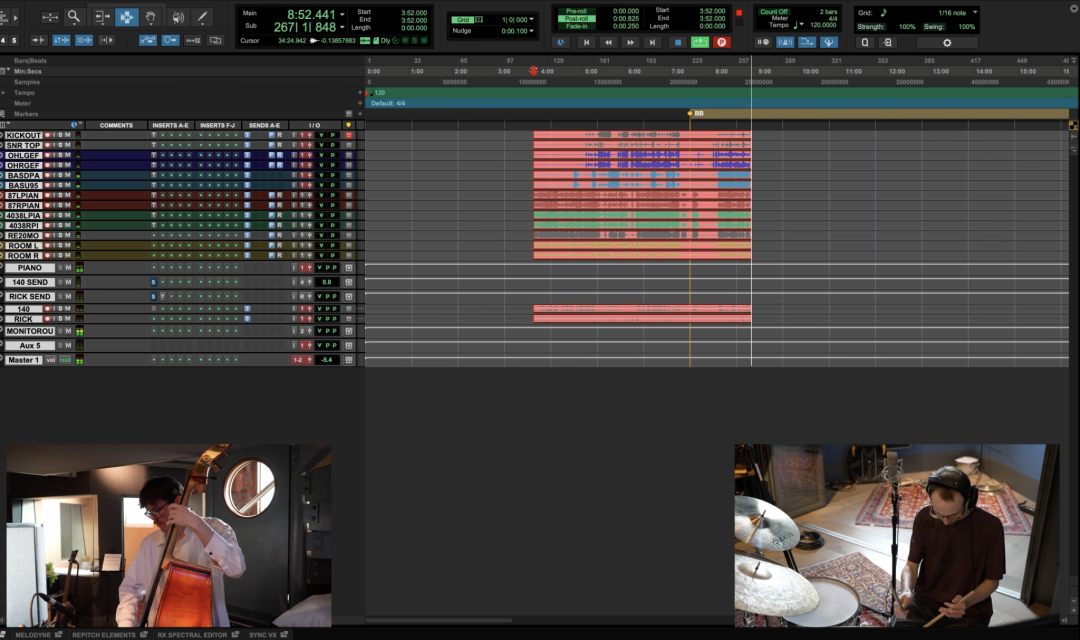
The result is a clean, full and stable bass recording before the signal ever reaches Pro Tools.
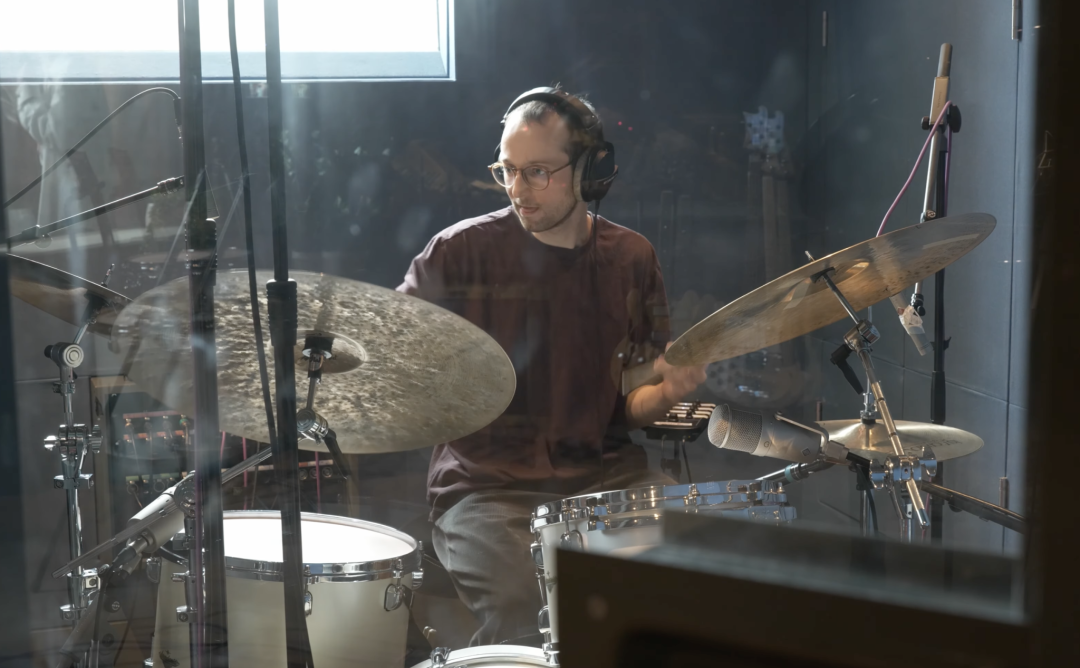
Recording the Drums
The first drum setup is intentionally comprehensive.
Sean uses an AEA R88 ribbon microphone alongside a pair of Gefell condenser microphones as two different overhead options.
The R88 provides warmth, depth and a smooth stereo image. The condensers provide more precise transient information and a more open high-frequency response.
As with the piano microphones, the overheads are positioned carefully so their capsules work together without creating unnecessary phase problems.
The goal is not to use every microphone all the time. It is to have different tonal options available during mixing.
FET 47s on Toms
Sean uses Neumann U 47 fet microphones on the toms.
These are microphones often associated with vocals, bass amplifiers and kick drums, but their large sound and extended low-frequency response can also make toms feel powerful and complete.
It is a bold choice, particularly for a jazz session, but it allows the toms to speak clearly when needed without relying on drastic EQ later.
The snare is recorded with M 69 microphones above and below. The kick drum includes an RE20 inside and a larger microphone placed further back to capture a smoother and more developed low end.
Sean also records spot microphones on the hi-hat and ride cymbal.
Those spot microphones may not be used throughout the mix. However, they provide extra definition when a drummer moves to the ride or when a small rhythmic detail needs to come forward.
It is far better to record those options and not use them than to need them later and discover they were never captured.
Checking Snare Phase
One of the most practical lessons from the session is Sean’s method for checking the polarity of the bottom snare microphone.
He asks the drummer to play a single snare hit and watches the initial direction of the waveform or speaker movement.
The top and bottom microphones naturally capture opposite movements from the drumheads. Flipping the polarity of the bottom microphone can help both signals move together and produce greater punch.
Sean explains that this is one of the first things he checks when receiving drum tracks for mixing. Incorrect polarity between snare microphones can weaken the impact of the drum considerably.
He also recalls the traditional studio method of placing a coin on a speaker. If the speaker moved forward and threw the coin upwards, the engineer knew the polarity of that channel.
It is an old-school technique built around a very simple principle. The speaker should move towards the listener when the drum is struck.
Recording Through the Console
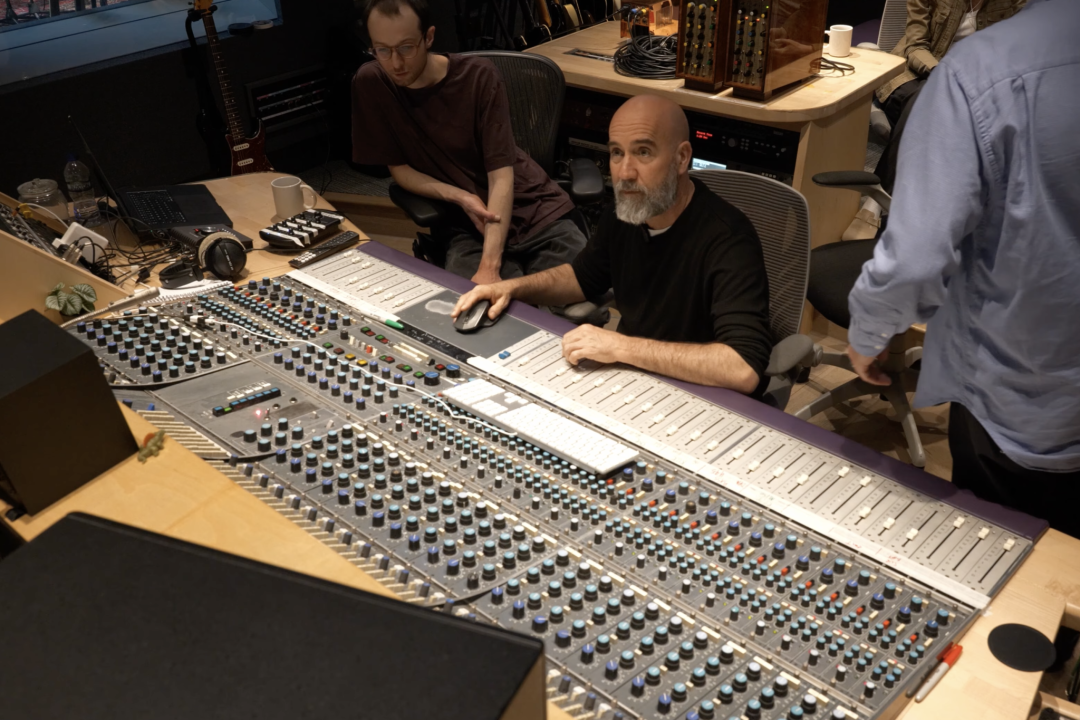
The drums are recorded through the Salvation Studios console and printed directly into Pro Tools.
Most of the channels have no EQ. Sean makes only small adjustments where necessary, including a little EQ on the toms.
The philosophy is to create a sound that already works before it reaches the recording software.
Rather than treating Pro Tools as a place to repair the recording, Sean wants the musicians to hear a finished and inspiring sound while they perform.
He also records effects and reverbs so the session can be recalled with the intended character intact.
The objective is simple. Raise the faders and the record should already sound like music.
Changing to a More Minimal Live Setup
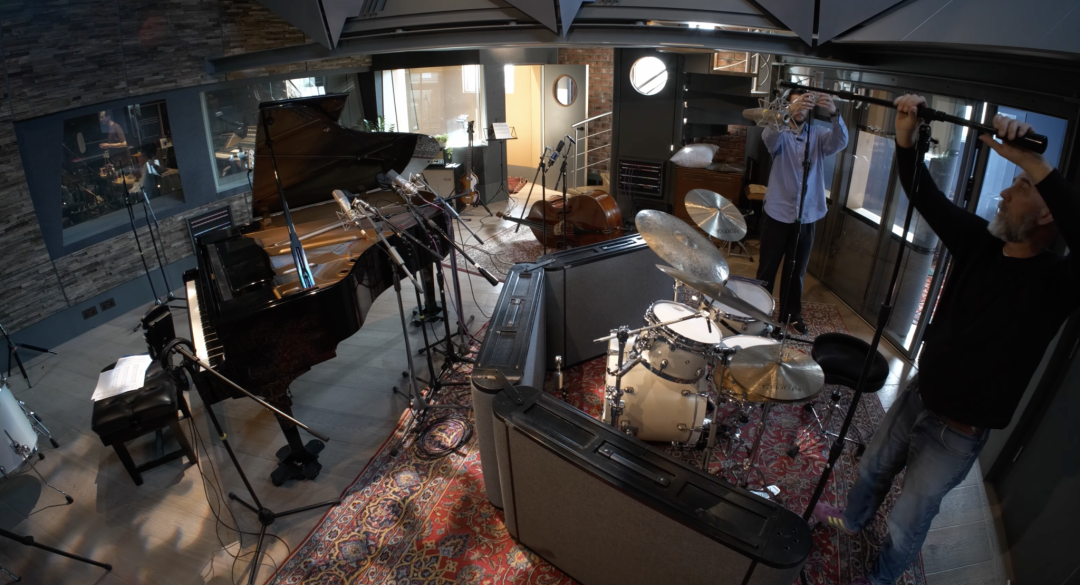
After recording the more controlled setup, Sean completely changes the room.
The bass player is brought out of the booth and positioned much closer to the piano and drums.
The musicians are placed as close together as possible to create cohesion and reduce the sensation of three isolated instruments playing in separate spaces.
Small glass screens and acoustic panels are used around the bass to provide some control over spill, but line of sight remains a priority.
Sean explains that blocking the musicians from seeing each other would defeat the purpose of recording this way.
Fewer Microphones and More Room Sound
The second drum setup is deliberately simplified.
Sean removes the tom microphones, hi-hat microphone and ride microphone. He keeps a top snare microphone, one kick microphone and a pair of overheads.
Instead of trying to capture every drum separately, the setup treats the kit as a complete instrument.
Additional room microphones capture the sound of the musicians interacting in the studio.
This approach accepts bleed rather than fighting it.
Bleed becomes part of the tone, balance and character of the recording. The musicians adjust their own dynamics naturally and the room helps glue the instruments together.
Why Record Both Approaches?
The controlled setup provides flexibility.
The isolated bass, close drum microphones and multiple piano options allow Sean to reshape balances during mixing. Compression and automation can be used without dramatically affecting the other instruments.
The minimal setup provides immediacy.
There is less control, but there is often more musical energy. The sound of the room and the physical relationship between the players becomes part of the performance.
Neither method is automatically better.
The correct approach depends on the musicians, arrangement and emotional intention of the music.
By recording both, Sean demonstrates the difference between capturing individual instruments and capturing an ensemble.
Performance Comes First
Throughout the session, Sean avoids overcomplicating the music.
When the band begins discussing how to finish a piece, his advice is to avoid forcing the ending. He encourages them to play what feels natural and respond to each other.
That philosophy applies to the entire recording.
Microphones, preamps, acoustic screens and phase alignment are important, but they exist to serve the musicians.
The best technical setup is the one that allows the players to listen, react and perform without distraction.
The final takes feel alive because the trio is playing as a trio, not as three separate overdubs.
Final Thoughts
This session at Salvation Studios is a great reminder that engineering is about balancing control with communication.
Sean’s detailed microphone techniques give him the flexibility required for a modern mix. At the same time, his minimal live setup demonstrates how powerful a recording can be when musicians share the same space and create the balance themselves.
The biggest lesson is not that every piano needs several microphones or that every jazz session should be recorded with minimal equipment.
The lesson is to understand why each microphone is there.
Use placement to create the sound before reaching for EQ. Check phase before adding processing. Preserve line of sight between musicians and never allow the technical setup to interfere with the performance.
Most importantly, listen to what the musicians are creating together.
You can also download the free multitracks from this jazz recording session here and explore both approaches for yourself. Try blending the different piano microphones, compare the drum overheads and listen to how the room sound changes the feeling and connection of the trio.
The transcript for this session includes the full discussion of Sean’s microphone placement, signal paths and recording decisions.