
Learning how to use a compressor is one of the most important mixing skills you can acquire. Compression is quite literally all over mixes, even becoming the sound we associate with loud, modern pop mixing. If there’s anything you want to really understand, it’s compression and how to use it effectively.
Compressor Basics: Learning the Parameters
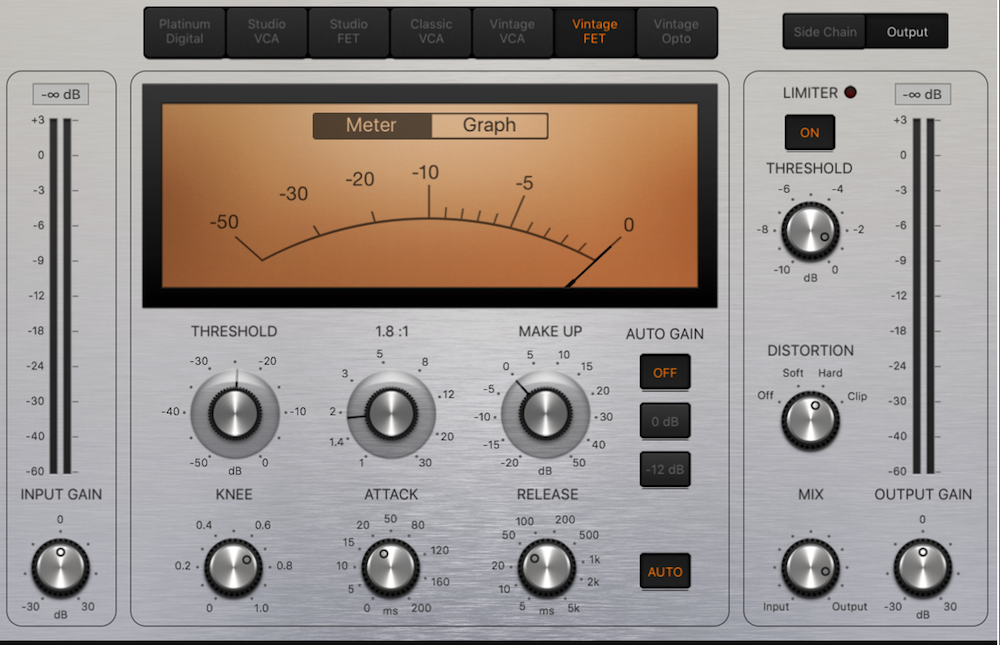
Most compressors share 5 common parameters: ratio, threshold, attack, release, and makeup gain. It’s important to first understand how these work, so that you can make informed decisions rather than blindly twisting knobs (not that that’s always a bad thing!).
Ratio

Ratio settings generally range from 2:1 all the way to 10:1. At 10:1, your compressor has become a limiter, which we won’t delve into just yet. A compressor’s ratio setting is exactly that; it represents a relationship between input signal and output signal.
- RELATED: The Importance Of Signal Flow
At 2:1, an input signal of 2 dB will output at 1 dB. An input signal of 10 dB will output as 5 dB, and so on. At a 2:1 ratio, your input signal is being reduced by a factor of 2.
The ratio determines how much a sound is being reduced in volume, i.e., compressed. However, a compressor isn’t working 100% of the time. Gain reduction isn’t applied until the input signal surpasses a user-determined threshold.
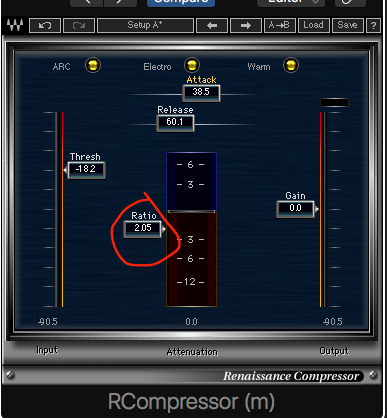
Threshold

A compressor doesn’t begin compressing until the input signal goes above its threshold. For example, if we set a compressor’s threshold to -18 dB, nothing below -18 dB will trigger the compressor. Any sound louder than -18 dB will then tell the compressor to start applying gain reduction.
Threshold tells the compressor when to turn on, and ratio determines how much gain reduction to apply.
Generally speaking, we use compression to catch the loudest peaks in our dynamic material. So, setting a threshold that catches and reduces those peaks to make our track level more consistent is the best way to begin. Be thoughtful with threshold; if it’s too high, the compressor won’t do anything at all.
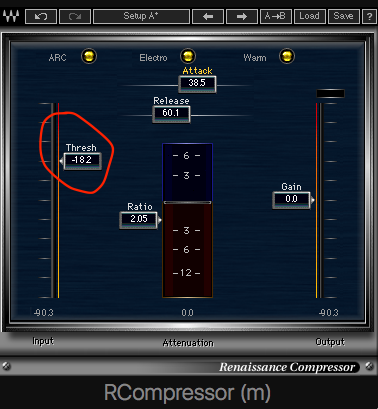
Attack

So far we’ve learned that the ratio dictates how much our input signal is reduced after it passes the threshold. But what exactly happens when the signal does surpass the threshold? Does gain reduction immediately kick in? Not necessarily.
The attack setting controls how much time it takes the compressor to apply gain reduction after the input signal passes the threshold. If we set the attack time to 5 ms, it will take 5 ms for gain reduction to apply after the input signal passes our -18 dB threshold.
Setting the attack time will vary from instrument to instrument, and even from song to song based on tempo and a variety of other factors. Most of the time, slower attack times work well; think somewhere between 20 and 40 ms. A slow attack means the entire note will be compressed after it passes the threshold, rather than just the initial transient. If you want to crush fast transients, say on a snare of rapidly-picked guitar, fast attacks do the trick.
Release
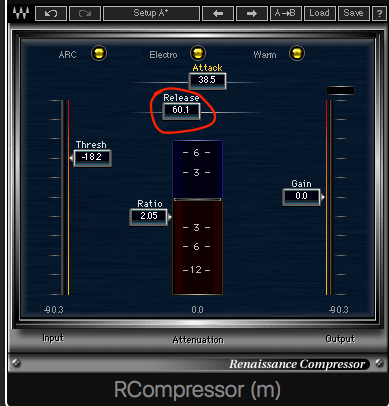

Release is another time setting that determines how quickly the compressor turns off after the signal drops below the threshold. Again, this is a very important setting that ultimately determines how the compression will sound.
If the release is too quick, the audio will start to sound unnatural. If it’s too slow, the compressor never shuts off. Typically with the release time, it’s advised to adjust it until it feels right with the pocket of the sound. A good starting point is somewhere around 60 ms. Where you go from there will depend on the overall rhythmic feel and tempo of the song itself.
Makeup Gain
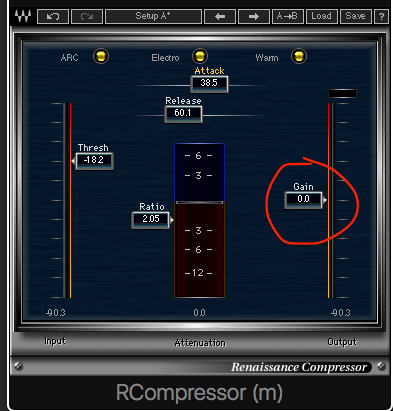

Because compressors actively reduce volume as determined by the ratio/threshold, our overall track level will be lower than before we applied compression. The easy solution to add back some of the gain that’s been reduced by using the compressor’s “makeup gain” or “output” control.
A general rule of thumb is to increase the makeup gain until the level coming out is equal to the level going in. Or, you can push the makeup gain even more to get more overall level out of a track.
How to Use a Compressor

The following are by no means hard and fast rules, and won’t work the same on every instrument. Instead, it’s a simple set of guidelines to get you up and running. You should rely on your fundamental understanding of compression parameters to make choices.
A Good Starting Point
Working with a single compressor, you’ll want to understand some basic settings to begin with. The idea isn’t to crush the instrument, but to experiment with gain reduction to achieve the desired dynamic control.
According to Bobby Owsinski, a renowned engineer, author, and educator, a 4:1 ratio, medium/fast attack, and medium release is a great place to start. You’ll then want to adjust the threshold for about 4 to 6 dB of gain reduction and see where things sit. From there, you can adjust to taste, confident that you’ve begun with a solid foundation.
For further consideration is where to place the compressor in the signal chain, namely pre- or post-EQ. There are many differing opinions and ultimately it all boils down to whichever sounds best to certain ears or in particular situations.
The main takeaway is this: a pre-EQ compressor, first in the signal chain, operates on the unprocessed vocal. Changes made to EQ won’t effect the compressor’s settings. The opposite is true for post-EQ compression, where equalization will alter the way your vocal hits the compressor.
Experiment with the given starting point and both pre- or post-EQ compression to see what sounds good to you!
Compress in Stages
Simply put, don’t be afraid to use more than one compressor on an instrument. For beginners who are likely hyperaware of overusing compression, this may seem counterintuitive, but the idea is this:
Instead of getting 10+ dB of gain reduction from one processor, use multiple compressors with 2 to 3 dB of gain reduction each. You’ll probably find that the desired dynamic control is there without unnatural or very audible compression. This technique is called serial compression.
This is very common on bass, which tends to require quite a bit of compression, though it can be applied to anything really!

Now that you understanding the basics of compression, you can move onto & understand some more advanced techniques such as multiband compression, sidechain compression, and parallel compression.