
Mixing and mastering are the two essential processes in polishing and finalizing a recorded song. If you’re making music that you plan to sell, or use to promote yourself (i.e., not a demo), you’ll want to invest some time into both. Many people new to music production confuse mixing vs. mastering, so we’ll clarify the differences!
Individually, mixing involves combining multiple layers of a song together so that they gel sonically. There are five basic technical and creative aspects of mixing that we’ll address below.
Mastering, on the other hand, is optimizing the overall sound of a track or an entire album. When a song leaves mixing, a mastering engineer will apply his/her own additional compression, EQ, and other signal processors as the final touch. For an album, at the most basic level, mastering ensures that overall levels are relatively even from track to track.
Mixing vs. Mastering
What is mixing?
Some of the same tools are used in both the mixing and mastering processes, so taking an in-depth look at how to mix is helpful. It’s important to remember, though, that the end goals of each process are very different! A mixing engineer has all of the raw audio and recordings in their session. They take the sound from totally raw, or dry, to something that resembles a radio-ready production.
They do so in various stages through the following.
Level
Level, or volume, is the first place to start when mixing. The level-to-level relationship between tracks will determine the overall foundation of your mix. Once you begin to bring up faders, you’ll find a rough mix quickly taking shape!
Start with the kick drum and work your way through the drum tracks until they’re nicely balanced. Continue with bass and the rhythm instruments before finally bringing in vocals and other lead instruments. Once you’re happy with basic levels, you can move on to the next element of your mix.
Of course, great mixes don’t stop at simply leveling with faders. You’ll likely need volume automation at select points further in the mixing process, though you can keep things simple when first learning how to mix music.
Panning
Panning allows mix engineers to place elements in the stereo field. Some panning tends to dictate itself, such as with drum overheads or multi-tracked rhythm guitars. Other times you can get a bit clever with it, employing automation or even auto-panner plugins!
It’s good to keep in mind that panning is often used to create width. If you have multiple vocal harmonies, for example, they may sound rather flat stacked on top of one another. But if you move a track over to the left and another to the right, with a lead vocal sitting in the center, you will have widened your vocals and made them sound bigger. This concept can be applied to anything so long as it sounds good to you!
Dynamics Processing
Dynamics processors are used to control the volume envelope of a sound. Tools like compressors, limiters, noise gates, and de-essers are all examples of dynamics processors, which can control or smooth out the peaks and troughs of a given signal.
Once you’ve established a rough mix with leveling and panning, you may want to start taming its dynamics. Noise gates, for instance, can be placed on various parts of the drum kit to eliminate unwanted bleed.
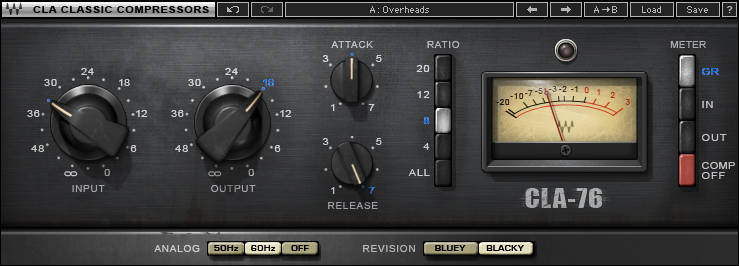
You’ll probably apply compression, too, throughout much of the mix on many instruments, either as an effect or to control dynamics. If there’s ever a processor you’ll want to fully understand, it’s compression. Using it well can enhance a mix, though the opposite is true if its application is haphazard! As usual, trust your ears.
Equalization
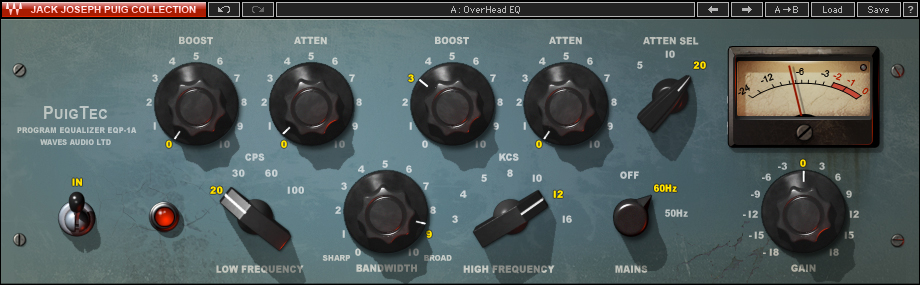
Apart from dynamics processing, EQ is one of the most-used tools in a mix engineer’s kit. In general, there are 5 “golden rules” of equalization to help guide your decisions when mixing:
- If something sounds muddy and dull, try cutting somewhere around 250 Hz.
- If something sounds honky, try cutting an octave up, around 500 Hz.
- To make an element sound better, cut unpleasant frequencies.
- To make an element sound different, boost frequencies.
- And finally, you can’t boost a frequency that doesn’t naturally exist in the given material.
Beyond the golden rules, EQ is extremely powerful and versatile. Surgical EQ can drastically improve an otherwise “okay” sounding instrument, and proper use of high-pass filters can massively improve the low-end content of a mix. It doesn’t stop there, though, as EQ use is limited only by your imagination and what sounds good!
We’ve also compiled an EQ cheat sheet to understand where frequencies of interest live in a variety of instruments!
Time-Based Effects
The most commonly used time-based effects are reverb and delay. Using either or both of these can create an aural space for an instrument to sit, can add “excitement” to a track, can add depth and dimension to an instrument, or can push a track further back in the mix.
To create an aural space, for instance, a great trick is to imagine the performer in an acoustic environment and to attempt to recreate what that environment might sound like by using reverb. Additionally, to make something sound bigger or more exciting, experiment with using small reverbs or short delays.
To add depth or push a track back, use longer delays or big reverbs. Again, beyond just setting up a time-based effect return and sending a signal to it, you can automate various parameters to achieve interesting sounds. Experience and creativity will play a major role in how you decide to utilize time-based effects.
What is mastering?
The biggest thing to remember when differentiating mixing vs. mastering is that the latter intends to put polish on the finished product. In mixing, individual tracks are paid careful attention, ensuring that they sit well for the final stereo bounce. In mastering, a final stereo bounce is usually all the engineer is working with.
There’s a great analogy that says mastering is like Photoshop for audio. You can buy a great camera, learn the art of photography, take beautiful photos, and sometimes things still aren’t quite right. The lighting may be off, or a smudge on the lens can ruin an otherwise perfect shot. A skilled Photoshop user can touch things up and make sure the photo is at its highest potential.
In a similar way, mastering engineers “touch up” an already incredible mix. In addition to equalizing track-to-track levels across an album, they’re also listening to songs individually and applying any additional processing that will help an already-mixed track.
Most of the time this will consist of mid-side processing that split up the center audio from the side audio. A mastering engineer can then apply EQ, compression, and limiting across the mix in ways that enhance the entire song.
SEE ALSO: Shadow Hills Mastering Compressor
SEE ALSO: Best Way to Get PULTEC EQ in Your Home Studio
SEE ALSO: Top 10 Transient Shaper Plugins
While you can learn how to master yourself, it’s sometimes best left to a professional mastering engineer if you want the greatest results. Mixing vs. mastering are separate art forms altogether, though lots of engineers these days end up doing both.
What are the differences between mixing and mastering?
The biggest differences between mixing vs. mastering are at what point they occur in the process. Mixing is the next step after recording and production. Once all the elements of a song are there, a mixing engineer takes the raw files and edits, adds effects, and gets the song to about 80-90% complete.
The mixing engineer then prints a stereo bounce of the mix (without any heavy processing on the mix bus!) to hand off to a mastering engineer. The mastering engineer takes the mix, hears it with a fresh set of ears, and touches it up to take it from 80 or 90% to 100%. This commonly involves precise EQ, compression, and finally limiting for loudness.